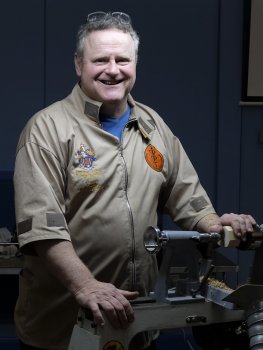
Les Thorne
17th September 2026
Les Thorne
17th September 2026
Some 40 Members enjoyed another chatty & humorous evening with Les Thorne, who had forgone a quiet evening with his Wife on their Wedding Anniversary to give the Club a
Masterclass on Bowl Turning
Hopefully, the large bouquet of flowers presented to Mrs Liz Thorne showed our appreciation and compensated for any disruption we might have caused.
A show of hands quickly revealed a few 'Les-Virgins' who hadn't seen tonight's Professional before, so Les described himself as a Jobbing Woodturner who only 'production turns' wood for a living by making it round for somebody else. As he gets old & grumpy, he doesn't do as much teaching as before because he fears he might find himself one sentence away from ruining his career! Years ago, Les might have turned 50 or more salad bowls as a job, but these days it is not economic for him to mass-produced bowls by hand.
Les has found that a significant number of novice woodturners were spurred by nostalgic memories of school Woodwork lessons, where the top achievement was to turn a bowl without having to bother with neat-fitting joinery. Unfortunately, it's a fact that Bowl turners have difficulty turning spindles well, whereas Spindle turners find turning bowls familiar. A proof of this might be that you won't see a Professional Turner ever needing to use a Scraper when turning a spindle so why would they need to for a bowl. People don't seem to realise that Bowl Turning is actually the same as Spindle Turning while deploying a few cheats. But there are no shortcuts in your new hobby. 95% of wood turning is Basic Tooling - that is getting your cutting tool to always work at its optimum while in contact with your piece. Optimum is found when the handle is neither too low/high, the flute is not too open/close and happens from when you progress from "can't get a good finish" to that instance when you "CAN get a good finish." Once that is mastered, you will have no need for specialist tools to get your finish. That said, rotten or abrasive wood might need to deploy some other techniques in that outstanding 5% of wood turning - but why worry about that until after your Basics come naturally. That's why Spindle Turning is best for honing your skills.
 A prepared bowl blank will invariably be side grain & across endgrain on what
will be the sides of the finished bowl. "Why is that?" asked Les.
The alternative is endgrain bowl with grain going from top to bottom. "Why
aren't endgrain blanks as popular?"
Carved bowls have been found in Neolithic Stone Age excavations (10,000 - 2000
BCE). Turned bowls didn't appear until
the Iron Age (1200
BCE). Bowls were being made for practical
use so Ancient Bowl Makers deliberately avoided endgrain orientation because it
is fragile, highly absorbent, and prone to cracking at the base when hollowed
wide. Effectively, the endgrain acted like straws and gravity ensured they
leaked like a sieve until the Japanese solved the problem with multiple layers
of lacquer.
The sides of Standard (side & across endgrain) bowl
blanks present a problem because a gouge can easily cut through the side grain
(even a bandsaw leaves a smooth finish) but across end grain, both gouge and
bandsaw struggle to avoid rough finishes. The aim then is to concentrate on
cutting the endgrain sections smoothly knowing that the side grain will look
after itself.
The sides of Endgrain bowl blanks are easily turned & shaped just like a
spindle but they are difficult to become evenly dry, so need to be treated as a
2-stage bowl - roughed out first to quite thin sides and then come back to finish
after the walls have dried sufficiently.
 Les had a 10" diameter by 5" air-dried Ash standard bowl blank that he had examined for
which surface would be best as the base to cater for any obvious splits or
blemishes that could be turned away. He had prepared a central drill hole for
his Screw Chuck in the planned top. Because this was a relatively large
blank, he chose to use a Tailstock Live Centre with a 'ring' - as
point centres tend to wedge themselves into the grain. The Tailstock would be
removed later when dealing with a mounting point.
First, the blank needed to be turned to round in relation to its current
mounting. The best first cut is made when you are standing in the safest place.
As Les pointed out, he personally turns up to 7' diameter or up to 10' length
pieces that will seriously hurt if something unexpected happens, so he makes no
apology that he is constantly risk assessing before his chosen tool starts
cutting wood regardless of size. Basically, stand where the piece is unlikely to
hit you if it comes off the Headstock. He started with a push-cut standing about
45º to the exposed face from where he reckoned by standing behind the toolrest
with his gouge pressing on the piece, he was unlikely to end up in the firing
line.
With toolrest height & angle set correct,
bevel in the direction of the cut and in
constant contact, he eased his way through the wood at a
feed speed his gouge could effortlessly remove without fighting to
keep the cut from deviating from a smooth trajectory. Push the tool faster
than it needs will result in it breaking out. Take too deep a cut, the
flute in the gouge can't clear the shavings adequately and will choke progress.
He likened us to Dry Fly Fishermen, who after a bit of gentle casting,
relax & enjoy the 'journey' whereas he was a Deep Sea Trawlerman trying to
extract the maximum for his time at work. This isn't his hobby. Consequently, he
would be pushing his gouge so that it would break the wood off in front of the
cut inevitably resulting in poor finishes in places and exhausting himself in
the process. But it was not an issue to Les because he was a long way to reaching
his final shaping, at which time he would change his approach to that of a Dry Fly
Fisherman!
The Flute of a gouge is designed to direct shavings away from the cutting edge
as effectively as possible; that's why they should be kept clean & shiny.
If you were to present a gouge to timber turning on a lathe as normal, but then
gradually turn the flute up (ie towards pointing straight up at 12 o'clock) the
increase of shavings flying upwards would make you think this was a more
efficient way to remove wood, but then it will bite when you arrive straight up
because the cutting edge that had been just one side of the tip, will suddenly
find itself precisely at the tip and will drag it into the timber instead of
cutting. The lesson here is that the closer you get to the best cut, the closer
you become to things going wrong. It's down to the individual to work out your
optimum safe place.
NB : Bowl
Gouges have deeper flutes than Spindles so it is easy to leave their wings very
high. Don't. You won't be able to make an efficient Pull Cut unless you
have low swept-back wings.
Les then discussed managing Margins for Error.
He demonstrated a passing cut with a Roughing Gouge, which despite him going
quiet and concentrating, proved that they are a weak tool that tend to leave a
poorer finish than a Bowl Gouge. Clearly there was no reason in this case to use
a Roughing Gouge - but if the piece had been one of those 5% of awkward blanks
that your Bowl Gouge couldn't produce a smooth finish, then one might consider
taking a risk to seek a reward.
Sometimes a difficult/dodgy technique might provide the solution; for example,
a Skew Chisel will often produce a better finish, but it cuts with a greater
chance of going wrong, so is it worth the risk? Les suggested there would
be no point for us to pick up a Skew 95% of the time because the Bowl Gouge will
do it for us. For those inconvenient 5% cases, we might be tempted to consider
it as a work-around, but consider that Les is proficient using a Skew Chisel
despite rarely having to resort to one and he is aware of the risks of Skew
Chisels, and that it's probably an unnecessary risk for Club Members who should
be giving themselves safe margins for error until
confident with their experience.
We are trying to unravel the timber properly by cutting it how it wants to be
cut. Les spoke of a Japanese Woodworker invited to Shows some 30 years ago, who
would use a block plane to produce lengths of shavings several metres long, thus
demonstrating cutting properly is possible.
Tool Suppliers regularly describe their Gouges shaped to specific bevel angles
whereas Les determines his gouges as Long, Medium or Short grinds describing the
relative lengths of their bevels. He favours a Long Bevel with low swept-back
wings because (being a Spindle Turner) he likes its slicing action through the
wood fibres - this grind is established with a 40º to 45º bevel angle. He judges
Medium length bevels obtained from 50º to 55º bevel angles produce a blunt
cutting edge that might well be stronger, longer lasting sharpness & easier to
use but at the expense of sacrificing the rest of the tool helping the smooth
cutting action that would be available with a longer bevel. The only cause
to use a Short Bevel (about 70º) is for long overhangs of tool rests, which are
good for bottom of hollows.
Long Bevel contact with the cut surface has a burnishing effect when done
correctly. It took Les years of experience to learn what amount of bevel contact, weight &
feed speed was
needed to get that smooth finish. If you get too much of any of these, there is a
likelihood of 'Bevel Knock' which is annoying vibration, skipping or chattering
across the surface indicating that the bevel has lost smooth contact. If it has
caused spiral ridges on the surface, you will need to make a fresh cut from just before
where the bouncing starts while making sure your thumb is holding the tool
firmly down onto the toolrest and your handle hand is being supported against
your body. The thumb on the toolrest will counter any excess pushing the
bevel onto the surface; locking the handle to your side converts the tool to an extension of your
body movement, which will have much finer control over bevel contact and feed
speed.
 A gouge will leave a smooth finish when the cutting edge is moving into a
grain supported contact.
To highlight this, Les demonstrated cutting in the wrong direction (against the
grain) and pointed out that he could feel through his hands and by the coarser
sound of the cut that the tool wasn't working smoothly. A lot of the cut
was acceptable but there were obvious pull-outs where the cut had passed into endgrain.
For Spindle Turning, the cut will be supported by cutting down into the wood -
think of when creating a bead, the tool starts cutting at the highest point,
then down either side to its lowest; with a cove, again the tool starts cutting
at the highest point, then down either side to its lowest.
Less intuitively :-
For Bowl Turning a Standard blank : the direction to move the tool to cut
into a grain supported surface for the outside of the bowl is from the
Centre towards the Rim; and for the inside of the bowl is from the Rim
down to the Centre.
It is totally opposite for an Endgrain blank : the direction of cut into a grain supported
surface for the outside is from Rim down to base Centre; and for the
inside is from Centre towards the Rim.
The Diagrams to the right show that as you work in the direction of each
arrow, there will always be some grain extending below & beyond your cut.
The two types of cuts are
the Push Cut : when the gouge's tip is
pointing in the direction of the cut, which has the advantage of
arms & body helping to control the bevel against the piece while applying an
element of burnishing; Spindle Turning is
all about Push Cuts.
the Pull Cut : when the gouge's tip is
following the direction of the cut, though this time your body can't help as much to control the
smaller amount of bevel in contact and its consequent less burnishing effect - but
with
the toolrest set close to the cut, it will help to compensate that reduced control;
It is also a quicker method to remove timber; Bowl Turning is a lot about Pull Cuts.


Les demonstrated a Pull Cut by holding the Gouge horizontal; rotating the tool in his hand until the flute pointed
towards 10 o'clock; positioning the bevel against the piece with the tip just
clear of the surface; moving his handle-hand down to below his hip, he started
making a cut by moving the tip towards the timber. He moved the tool slowly & steadily towards
himself allowing the gouge to do the cutting through the wood supported by the
bevel while producing
strong shavings flying up from inside the flute - all because the wood was
unravelling properly.
He commented that a Pull Cut with a ½" Bowl Gouge would perform better
with a more powerfully driven lathe but a Hobbyist's Lathe of up to 1 horse
power would be ideal with a ⅜" Bowl Gouge although it is important the toolrest is kept close to
the work. Don't attempt a Pull Cut with the tool overhanging the toolrest
excessively when you could move the rest to a new position that would be a
closer support for the cutting edge. A curved toolrest can be a great help,
particularly for deep inside Pull Cuts.
He demonstrated with the aid of wet felt-tip ink drawn on the bevel
that while it was in contact with the surface of the piece
above centre, he could maintain smooth
control of the tool.
Les then finished his outside shaping, restating the Basic Tooling Optimum
performance depended upon the coordination of Tool Positioning, Lathe
Speed & Tool Feed Speed. We would recognize this when it felt like
the tool was doing it on its own. His tip to find this 'sweet spot' was to
practice at a very slow lathe speed with the tool held as described above so the
gouge is effortlessly creating a shaving while you slowly follow the cut.
Finishing is where the Hobby Turner
believes that Special Tool he saw the Professional use at a show will allow him
access to the last 5% of Basic Tooling. That's not guaranteed. The Pro would have
made sure that he chose a perfect piece of wood for an amazing demonstration of
his Special - after all, he would lose his audience if it didn't impress.
Les admitted he was the same. He would want to buy a putter that he saw featured
at a Golf Event and which worked every time for that Ryder Cup team winner - but in
the cold light of reality, it's unlikely his handicap would be troubled much.
The winning strategy is not that Special Tool at all, but rather the technique
you use with your own tools. Save your money and
practice more!
It was now time to remove the tailstock and create a mounting point for
Chuck Jaws before Les finished off the outside like a Dry Fly Fisherman until he
was satisfied with the shape.
For final surface refinements, a Shear Cut
with a Bowl Gouge can be useful but there are a couple of warnings when not
to. This cut involves holding the gouge with the flute facing the bowl's outside
surface so it's almost closed and entirely without any bevel support; toolrest further
away than with Pull Cutting and regularly re-positioned around the outside so
gouge can be kept perpendicular with an overhang to cut above centre; handle-hand down low allowing only the lower gouge wing to caress the
timber. With an increased lathe speed, bring the tip towards the surface to start producing ultra fine
shavings.
Do NOT try to Shear Cut on :-
an inside surface - use a Round-Nose Scraper instead.
on curly wood types - eg rippled, knotted, Rosewood, some
Oaks etc.
This technique could achieve a 320 grit finish straight off the tool.
Tenon
or Recess? Les declared that this decision
had nothing to do about strength; both have plausible arguments for and against. A
more important consideration is versatility.
A Tenon/Spigot has options to incorporate it into the foot or remove
it. Several millimetres from the bottom of the piece would be lost - although if
it's such exquisite wood, you could just glue some scrap timber to the bottom for
shaping a Spigot without losing those millimetres.
A Recess is just a hole in the bottom, and that would be perfect for
a pedestal bowl or for a large platter - be mindful that the shallower the vessel, the less
you would need to make the depth of your recess while still maintaining enough grip.
Les decided upon turning a straight-sided spigot to fit his jaws with a
flat clean-cut ring around it that will let the top of the jaws have a firm grip
of the bowl during subsequent side forces of hollowing tools.
Having got the bowl's outside surface to a shiny tool finish, he wanted to
demonstrate a Continuous Bead Cut. This Ash will be perfect, which is why
he chose it, but it is a wood dependent thing. Not all woods respond to this cut
and faced with a blank he wasn't certain about, he would have turned a practice
4 or 5 beads before he had got to here. The main problem to overcome is that
there is endgrain in these beads, which are susceptible to torn out grain - sanding can hide lumps
but not holes, so is not a solution.


Using his Signature Tool (this one isn't for awkward woods so is worth buying!), his first pass was for marking out, his second would be a turning pass. With toolrest set high, Les stopped talking and his tongue was between his lips so he must have been concentrating hard. 70 seconds later he had completed 27 beads from spigot to rim in one continuous movement of sweeping elbows and darting changes of tip direction. Afterwards, there was applause.
(click for close up view)


The technique involves a proper cut on one side and a
cheeky cut on the other. The cheeky bit is taking advantage of when cutting a
bead on side grain, the upward cut of the bead is in fact cutting into a grain
supported surface. Les is cutting down into the groove while lifting his
handle-hand so when the gouge reaches the bottom of that bead, it scrapes a
V-shape where the next bead will start. So when he opens the flute for the
upward cut, the bevel is there to support a smooth finish, It is effectively a
Pull Cut into a Push Cut which leads to a perfect surface without sanding.
Start off practising with large beads one at a time. It does need you to
be bold with your movements but your main focus must be prevent the tip dropping
into the wood, which is best done by starting to move your handle-hand down just
before the cut gets to its lowest point as you change from the Pull to the Push.
You might be tempted to try specialised Beading Gouges & Cutters but they are
designed specifically for spindle work. They rely upon scraping so will
inevitably create pull-outs on side & endgrain.
 It was now time to mount the piece on its spigot. Les found the top
surface was dusty & weathered so rather than using a freshly sharpened gouge, he
used a well-worn one (or even a carbide) instead of blunting something perfectly sharp. The plan was to have a fancy rim without colouring or texturing
and demonstrate an undercut with a Gouge without needing a Scraper.
He used a Spindle Gouge (despite it being a bowl) because he could work very
close to the toolrest. He shaped the rim with a curve ending far enough
from the outside edge to give room for wall thickness plus an undercut and
highlighted the width of the rim with a couple of beads, which would enhance
the piece.
Hollowing a bowl is
much the same as turning a cove except there are a lot more sideway forces
(particularly at the rim) acting on the Headstock, hence that flat clean-cut
ring for the jaws to latch on & resist any rocking. So the timber is not
for moving but when you present a gouge at a normal cutting angle, you will have
a devil of a job to prevent the spinning blank grabbing the cutting edge and
hurling your gouge outwards leaving a spiral groove across the rim. To control
that tendency, you have to stop the cutting edge from skipping outwards by
firmly gripping (eg overhand with the shaft held steady by your palm) as the
edge goes in and makes a groove for the bevel rub to control the direction of
cut. Other ways to help are to use a parting tool to start off the initial
groove. However, for a Natural Edge bowl with its variable height rim, you will
need to master a clean cut in from fresh air to the side wall every time in
order to keep the edges crisp.
 Les quickly hollowed out towards the rim & about 1" below in a series of steps
and body movement leaving a pyramid in the centre to add stability to the base.
He commented on the constant sound made when the bevel was being kept in
contact. He demonstrated what happens when it started to lose contact - the
sound went higher in pitch and shrill-like until he lowered the handle or
brought it back towards his body or a combination of the two.
There was now room for an Undercut,
which Les feels can create a shadow and a little air of mystery. The technique
relies upon if a gouge tip is pushed straight in, it will continue in a straight
line parallel to where the bevel is pointing. So going under the rim is
simple but we have to quickly turn to curve parallel to the outside edge within
about 1" of travel by opening the flute and curving up, over and back down
towards the bowl centre. This will require an intuitive movement of the
handle-hand going away from your body to start then goes down and twist to open
the flute to arc the cutting edge round the corner while maintaining bevel
contact. It's like driving a car properly - you stop watching what you're
doing in favour of where you're going. This method is far superior than a
Scraper but it needs practice. With the increased overhang, there is a
likelihood of some vibration which could be alleviated by using a ½" Bowl Gouge
rather than the ⅜" - not for taking a larger cut but just to ride through that
vibration. When cutting the bottom of the bowl, a Short Grind tool on a long
overhang can pick up the bevel contact with ease (so long as the wood is stable and
not spalted) but it cannot remove timber
very quickly.
You have probably been told never to leave a lump in the bottom of your bowl; well Les is doing so on purpose and to ensure nobody thought it a sloppy mistake, he made it big. If the bowl blank had been orientated with its base close to the centre of the tree and the rim nearer the tree bark as Bowl A in the diagram below, astonishingly the grain of the button would run as curved lines at right angles to the rest of the bottom. Clearly, tonight's bowl was orientated like Bowl B.

(click for close up view)


The important point to take away from tonight's demo is that Les does about 10,000 hours every 5 years of production turning so, inevitably, this technique comes to him without thinking much. But no one wants to just tediously practice, practice, practice. What Les would like us to do is get a little better every time. Try what he has covered tonight and if it hasn't worked, then of course resort to Shear Cutting or going round with a Scraper or abrasives to get it to a finish you are happy with. That's not a failure because every time you have attempted, you are adding to your experience. Take opportunities of trying that smooth Push Cut with the bevel in perfect contact while, for example, getting a blank into shape. You will find it more & more satisfying as experience is gained.
Some 40 Members enjoyed a chatty & humorous evening with Les Thorne, (who had
come from a day's work turning green Oak).
Les envied a hobby woodturner's lot who could turn what and when they liked.
He was a Jobbing Woodturner, which meant he had to turn what others wanted for
when they wanted them.
Consequently, he listed his hobbies as golf & fishing and never woodturning.
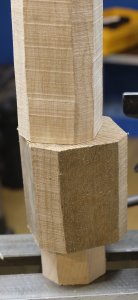
His woodturning meant constantly looking at how long a job would take. For
example, if his first gouge work was to turn the piece from square to a
cylinder, he would reduce time wasted in moving his tool rest from its starting
position by cutting several squares at a time into octagons with his bandsaw;
when there are 100 units to turn, that apparent extra job saves about an hour
overall.
Since his last visit, he has moved away from colour and texturing demonstrations
as he had noticed that very few recreational woodturners chose such finishes in
preference to just working with the wood.
Tonight,
Les was making a box with a reversible finial while spotlighting basic gouge work and planning considerations along the way.
Starting with a 3½" octagon of Oak for the body and 2 pieces of Sycamore (which
Les considers as Hampshire Weed) for the base and for the double ended finial.
The Oak octagon was mounted between centres and turned to a cylinder.
From a professional's point of view to be productive, one has to be as quick and
effective as possible and there is no reason why the hobbyist shouldn't be the
same.
Les talked about presenting the Roughing Gouge at its 'sweet point' and
maintaining the angle with body movement. Faster body movement achieved
quicker removal but concluding with slower movements achieved a smoother finish.
A common fault with hobbyists was allowing the bevel angle to get larger than
the ideal 40°- 45° when sharpening. A longer bevel may have a weaker edge but it
remains sharper for longer if always presented at its 'sweet point'.
Les used the centre quadrant of his Roughing Gouge's cutting edge for the quick
removal and kept the outer quadrants sharp for his smoother finishes.
With a cylinder turned, he needed a spigot to fit his chuck. Les prefers to
create this at the head stock end of the piece where the best support is found.
The initial hollowing could be done with a gouge or a drill. If the latter, he
suggested to enlarge the centre point of the piece with the tip of your tool
sufficiently to avoid the drill bit 'skating' over the end surface and ending up
off-centre.
Les started with a Spindle Gouge with a reasonably fast lathe speed to better
throw out the shavings.
He finished off the hollowing showing the pros & cons of various hollowing
tools.

(click for close up view)
Surprisingly, the smallest diameter scraper seemed to be the quickest at
removing the inside.
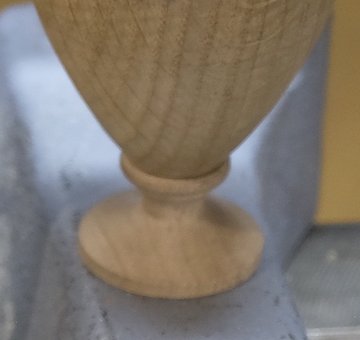
Les is a great advocate for not letting a spigot dictate the size of the base.
In tonight's case, the hollowed body was shaped like a trophy cup finishing off
narrow at the bottom allowing only a small diameter spigot. An appropriate
design to connect to the base was small at the top, wide enough at the bottom to
avoid topple while remaining squat overall. He demonstrated how his Detail Tool could get
into tight spaces and how it could produce a smooth
finish with just its pointed corner.
Rather than parting off completely, Les chose to part down to leave a central
stub of a
couple of millimetres diameter which could then be easily & accurately
removed with abrasives.
Finials need to be in balance with the overall piece; what Les described as,
"seen but not heard." They shouldn't dominate nor should they appear
measly. The ideal woods to select for fine detailing tend to be fruit woods;
Cherry, Holly etc.
Tonight's finial was going to be double ended so thought had to be given as to
how to mount the wood to turn the second finial after completing the first.
With the last piece of Sycamore between centres, Les turned a spigot to fit his
chuck and demonstrated various techniques to produce a tall, thin finial coming
from a base turned accurately to the top lip of the finished body.
Having cunningly planned the diameter of the body's lid to be oversized compared
to the chuck's true circle diameter, there was now plenty of room for the tall
thin finial to disappear down the centre of the chuck while allowing the jaws to
grip the first finial's base securely before turning the second finial.
There is little point in turning an identical finial to the first so Les decided
upon a door knob type.


(click for close up view)
It is worth noting that all surfaces in the above photos are remarkably, just
tool finished.
Les didn't want to bother with abrasives in order to complete the demonstration
within time.
The May Competition was set for a turned example of a vessel with a finial.
(photos by Vic Russell, Andy Ogilvie & Rick Patrick)
<to
Pro Index>
Les Thorne is a Registered Professional Turner (RPT) and Liveryman of the
Worshipful Company of Turners.
He can be found at
<www.noturningback.co.uk>
Les Thorne
6th May 2017
Les gave a very interesting demo in a jovial manner with amusing quips as
well as useful hints & tips along the way.
He demonstrated 3 pieces :- a carved and decorated box, an ash bowl decorated
with torching and lime wax and a wet elm natural edge bowl.
He also gave a quick but useful guide on that bête noire of turners , the skew
chisel, even showing that you could use a screwdriver in certain places when
sharpened.
Decorated Box -


Ash Bowl - Torched & Liming-waxed


Natural Edge Bowl in wet Elm