
Mike Haselden
Demonstration of Using a Story Board for turning multiple identical pieces
and other Tips.
Thu, 21st July 2022 at MWCC Club Night
Mike is a seasoned turner who passed the AWGB Demonstrators course to become an
approved woodturning tutor.
He supports and demonstrates regularly at his home clubs of Hampshire
Woodturning Club and the Forest of Bere Woodturners Association.
He is renown for being a 'Mystery Turner' in as much as he specializes in tips,
shortcut gadgets and starting his demonstration without pre-announcing what he's
going to turn. It certainly holds everyone's attention right from the start of
the evening.
Mike started with a simple gadget he had made to aid keeping his banjos and tail
stock moving smoothly on their rails. Working on the same principle as rubbing a
candle on a saw, he had cut down the end of a used tin can into which he had
jammed a tightly rolled up cloth so that it just protruded above the top. He
then let the cloth soak in Liquid Paraffin so that he could quickly wipe over
the rails before he started his session.

(click for larger view)
His next gadget was a detachable magnetic
perspex guard made for his Parting Tool, which allowed him to use one hand to
work the tool while the other could hold an outside spring calliper without
shavings flying up into in his face.
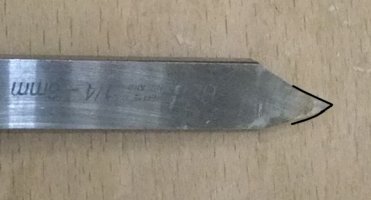
Mike also pointed out his way of grinding a wide Parting Tool with the bottom
surface slightly curved for a smoother movement into the piece.
He also advocated for lathes with movable control boxes - he would often find it
useful to set the box on the head stock at a height that he could trigger the
off switch with the side of his body by a simple lean to his left.
His first presentation was to promote turning a sphere by
hand rather than by a jig; not because jigs can be good (as well as expensive!) but
rather that using a jig was machining while turning by hand was true
woodturning.
He used matching sized ring centres for head & tail stocks to hold a prepared
45mm blank.
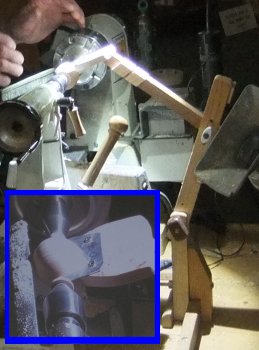
A template system comprising a bracket was fitted onto a track screwed to his lathe bench. This bracket had an adjustable arm which allowed space for banjo movement. That arm was fitted to a second hinged arm which supported an appropriate sized template. The bracket was adjusted along the track so that the template fell exactly in line with the revolving centre.
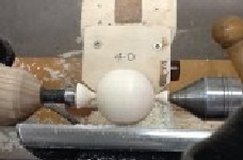
With the blank held between centres, the template arm was
initially positioned clear of the revolving blank. This was first rough
turned and then carefully turned to the correct diameter to suit his 40mm template.
The template arm was then lowered to swing
over the revolving work and the shaping proceeded gently allowing the template
to fall against the piece by gravity.
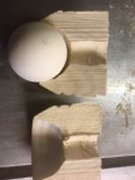
The spigots were turned down
to a very small size before being trimmed and hand
sanded.
The sphere needed to be held on a good fitting cup chuck. However, sanding and relocating the sphere to cover the whole area is very slow and tedious with stopping the lathe, removing the sphere and replacing it in a different position.
 A quick way is to have a suitable push rod through the headstock with which
to push and relocate the sphere in the cup chuck without stopping the lathe. Of
course, the cup chuck needed a hole through the bottom for the push rod.
A quick way is to have a suitable push rod through the headstock with which
to push and relocate the sphere in the cup chuck without stopping the lathe. Of
course, the cup chuck needed a hole through the bottom for the push rod.
To prevent it flying out of control
when the lathe was running, Mike kept his push rod captive using a bungee between the handle
and the head stock.
To avoid damage marks on the sphere he had glued a piece of cork to the end
of the push rod.
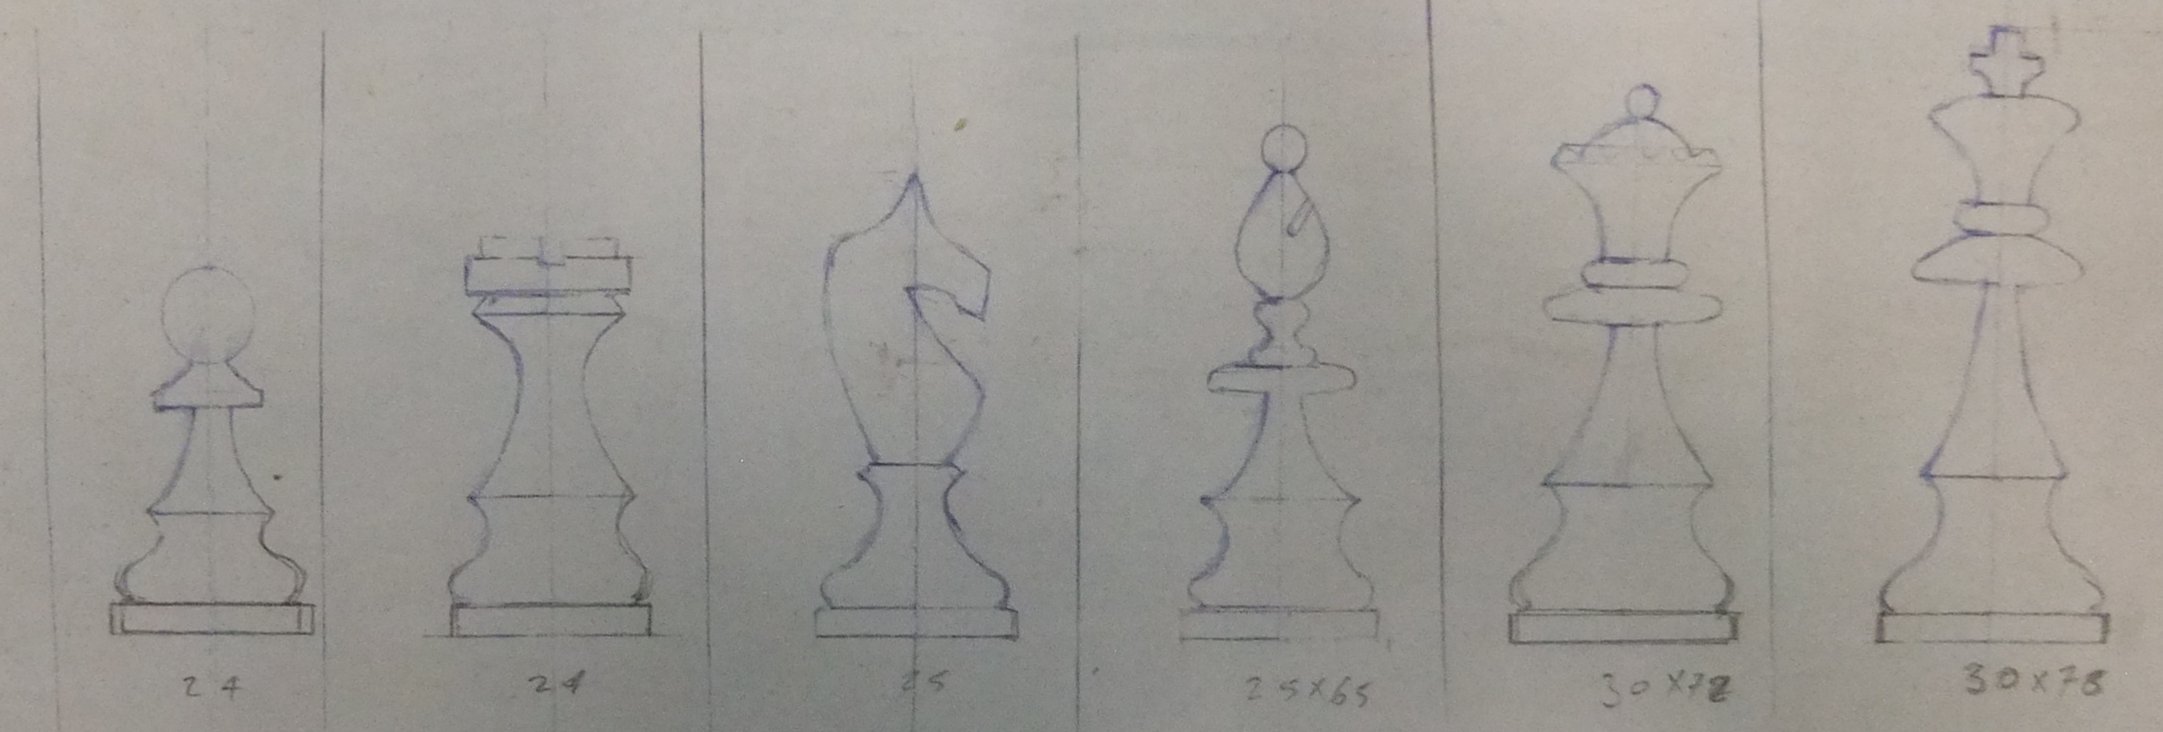
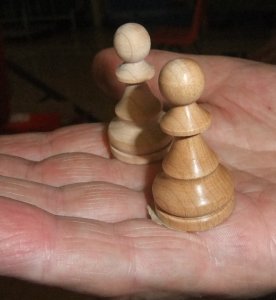
Mike's main presentation was turning a set of chess pieces which can all be basically produced on the lathe plus a few individual saw cuts for the home rank pieces, although more intricate for the Knights. This undertaking required multiple identical pieces - the most being the16 Pawns - and so the first task was to construct 6 full scale templates for the respective pieces. Mike had found a likeness of the popular Staunton Chess design to be the simplest to draw with straightforward shaped blocks.

(Click either for enlarged image)
With Pawns being the shortest, the pieces
gradually get taller from the outer squares up to the King.
The drawings had been separated, mounted on some plywood for rigidity and
parallel lines were drawn across the paper at significant changes of direction
of the outline. Where these parallel lines reached the edge of the ply, he had
created a groove so his pencil would be able to put an accurate mark on the
piece time after time.
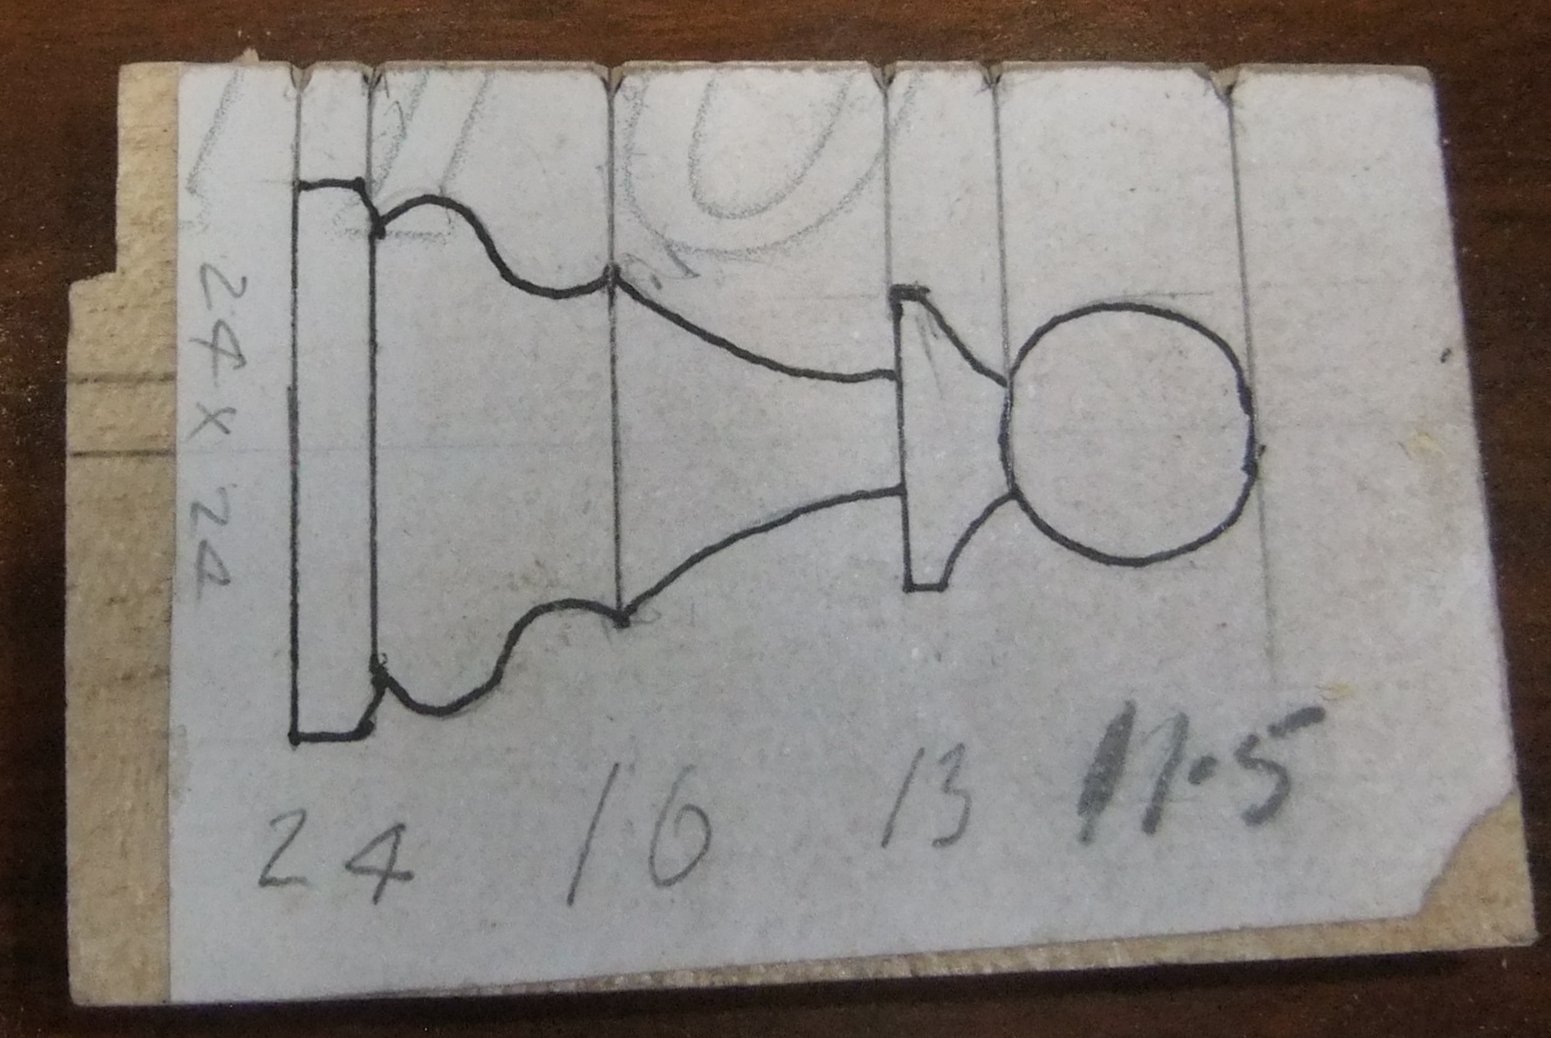
For the demonstration, Mike chose to turn a
Pawn.
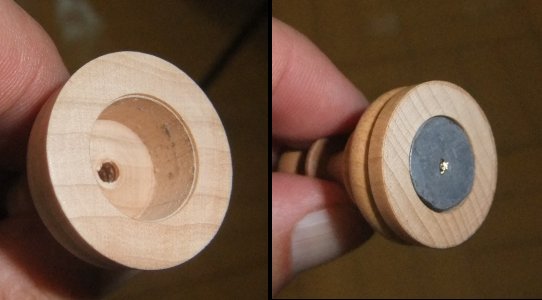
He had prepared a blank turned to a cylinder of a diameter equal to the base of
the Pawn and drilled a central hole about 20mm deep into the bottom of the chess
piece so it would snugly fit the spigot of his pre-made wooden screw chuck.
He positioned the Pawn template against the side of the cylindrical blank and
transcribed the "story lines".
Using the bracket gadget he had used for turning the sphere, he adjusted it to
hang close to the top of the mounted blank to help gauge the various slopes of
each block for when he started turning.
(Click for enlarged image)
At each pencil mark on the blank, he used a Parting Tool to reduce the diameter to the prescribed measurement as listed on the template diagram just above the blank and reminding himself which side of the mark was lower. His technique with the Parting Tool was to slightly rock the tool from side to side which seemed to result in a cleaner, quicker cut than turning with a straight on push. This was where his magnetic perspex guard stuck to the top edge of his Parting Tool was a great help.
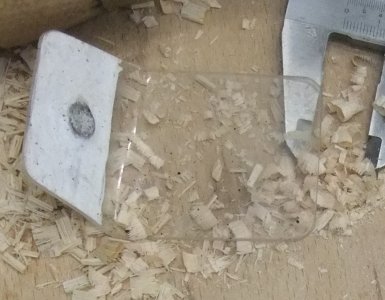
Mike had also adapted his outside spring calliper by braising a metal washer to each end of the arms so that the callipers were less likely to mark or catch the piece as he parted down to the required diameter. For similar reasons, he had rounded off the points of his Vernier Calliper, which would probably offend our metal working colleagues.
With the aid of his true scale diagram in the same line of
sight as the turning piece, he continued to work on each section with a small
Spindle Gouge.
The smaller the piece, the faster he ran the lathe.
After slowing the lathe speed, he finished with abrasives folded to the various
contours. As abrasives can blunt any sharp edges, he made gentle and
minimal use of them although he knew he could bring back the sharpness with a
Skew Chisel.
The Pawn was coated with Sander Sealer and after drying,
he would apply a Melamine Lacquer and set aside for a week for it to chemically
cure to a particularly tough surface before any final coat of wax.
In order to give each piece the right 'feel', he used molten lead to fill the
hole where his wooden screw chuck had fitted.
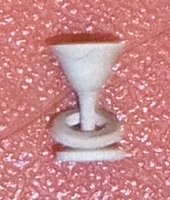
For his final presentation, Mike announced that he wasn't sure what he was going to turn; but within 5 minutes, he had managed to turn a goblet with a captured ring that wasn't more than 15mm tall.

photos by Rick Patrick, Andy Ogilvie & Hampshire Woodturners Association