Liz Kent
Demonstration of Carving & Dry Brush Colouring
Thu, 19th September 2019 at MWCC Club Night
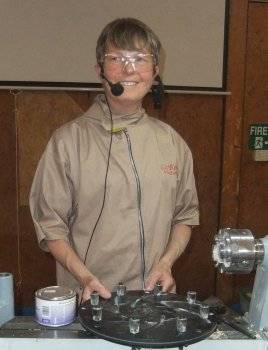
Liz introduced herself as a hobby turner who became moved
after watching professional turners at Axminster & Yandles (virtually on her
doorstep) to take a AWGB Demonstrators course and subsequently became an
approved woodturning tutor. She specializes in colouring & burning techniques
and demonstrates at her home club of Martock & District Woodturners as well as
many clubs in the South West.
Liz explained that as she tends to work alone at home, she always uses a full
face mask but when demonstrating, she would be using safety glasses for ease of
speaking although she would don the mask when she was carving with the grinder.
 Her
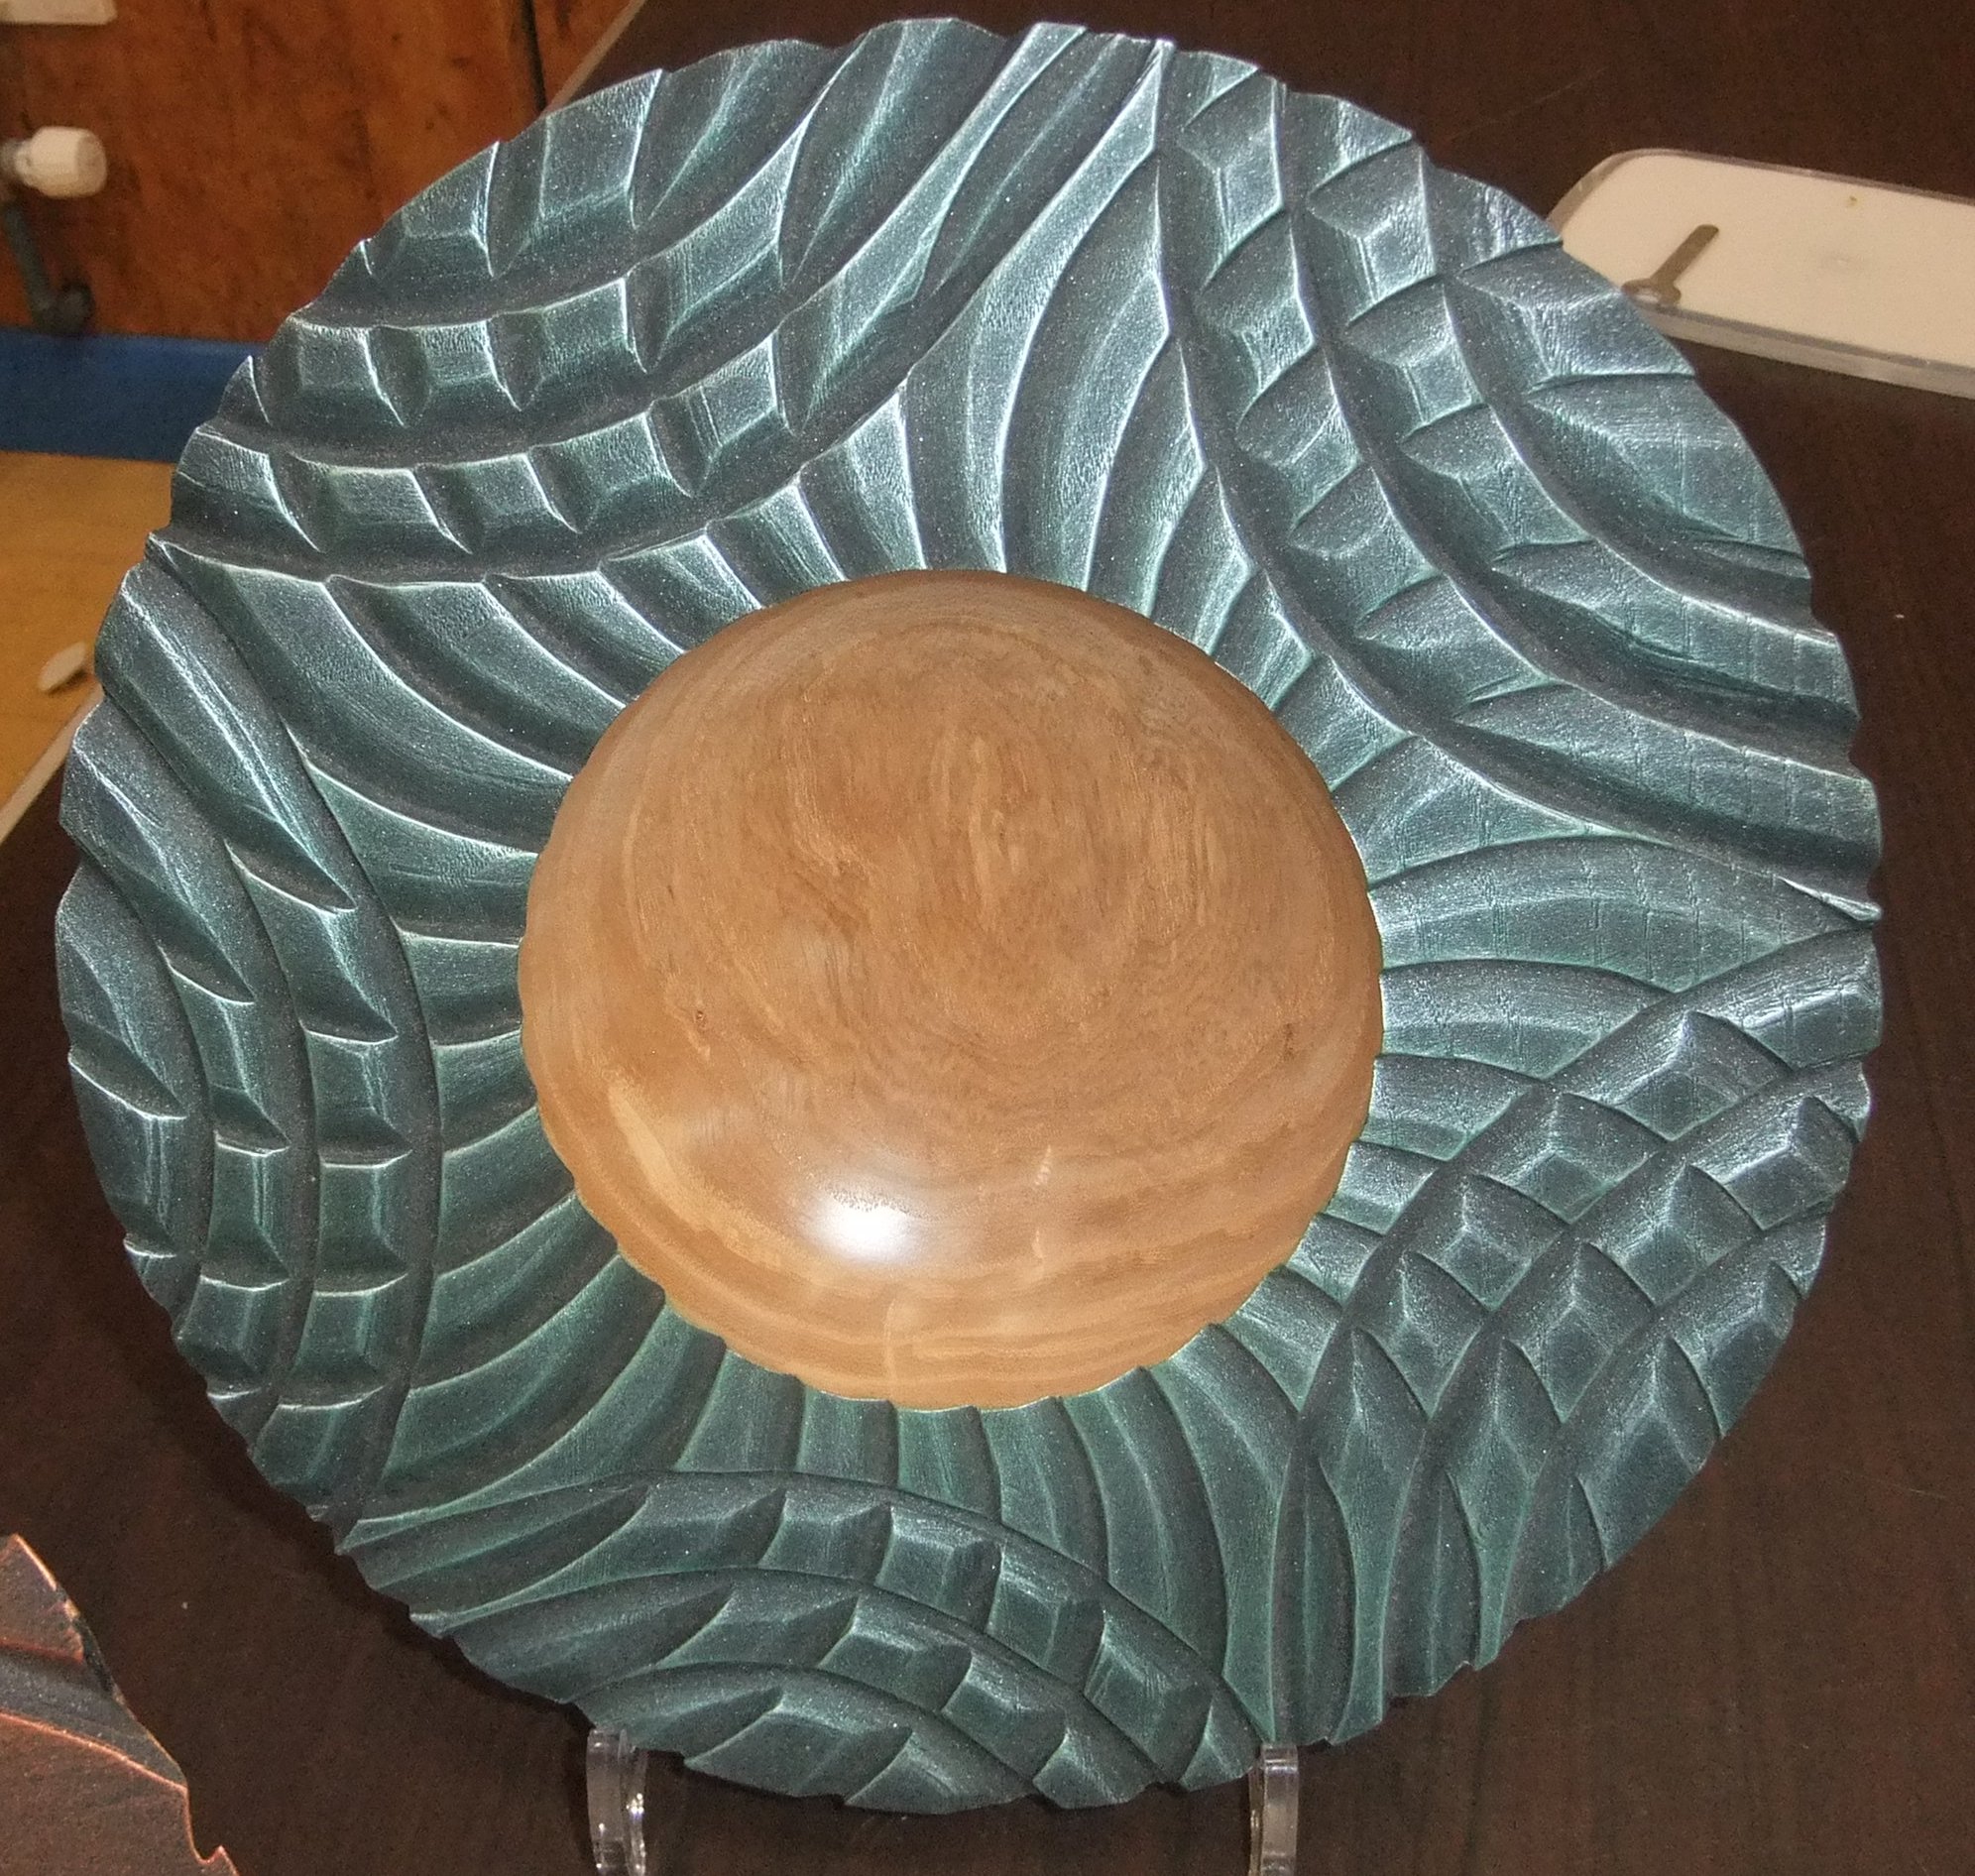
project tonight was from her 'Dragon Bowl' series with colouring inspired by
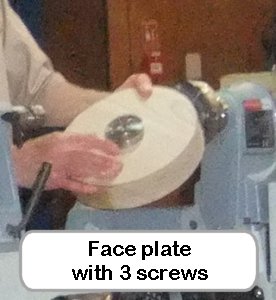
Mark Sanger. An ash bowl blank had been prepared with a face plate, which she
favours over other drives for ease & speed of screwing on and off.
Her
project tonight was from her 'Dragon Bowl' series with colouring inspired by
Mark Sanger. An ash bowl blank had been prepared with a face plate, which she
favours over other drives for ease & speed of screwing on and off.

Liz's own preference for these bowls is to have an even curved outside to avoid a bottom heavy look and a rim that slightly inclines inwards. The outside was quickly formed together with a spigot while demonstrating techniques of pull cuts, shear cuts and a Hope Pro-Sander.
The outside was then treated with sander sealer, primarily to protect from paint overspills applied later to the top surface. Once reversed and driven through the newly formed spigot, the top was evened off; the rim was shaped slightly inwards; the top of the bowl was marked where the inner & outer edges of the design would extend and where the mouth of the bowl would start. Additionally, a 10mm hole was drilled into the centre.
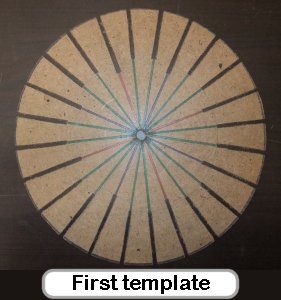
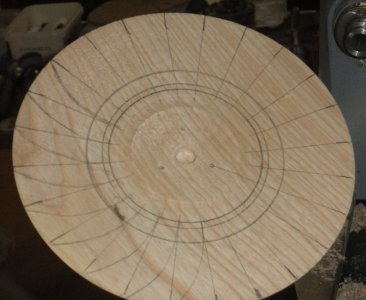
Using a carving jig fitted into a banjo, Liz positioned the chuck and workpiece at a lower raked angle allowing for a more comfortable and controlled sweep of her cutting tool. But the decorative curves had to be planned first. The drilled centre hole now became clear because it held a template steady over the piece using a plastic grommet, which allowed her to have both hands free to quickly pencil 24 symmetric marks near to the rim's edge. Opposite marks were pencilled to leave 24 'rays' appearing to emanate from the centre. Curves were then drawn freehand from the inner edge of one ray to the outer edge of its neighbour.
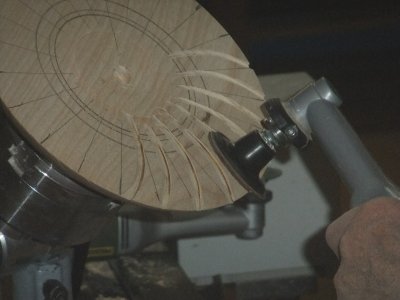
After a change of protective facewear, a Proxxon Tungsten
Grinder with a flat cutting disc was used to cut small grooves along the
freehand drawn curves.
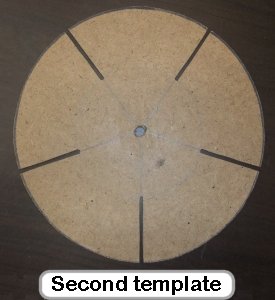
Liz has found from experience that the 24 carved arcs across the rim face are
set off best with curves centred from an odd number of points on the bowl's
edge. These points were established with another template for 5 symmetrical
points.
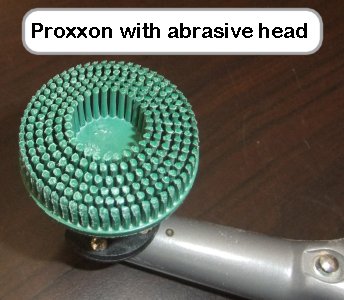 With
all the carving completed, the Proxxon was changed from a cutting to an abrasive
head of wires covered with plastic.
With
all the carving completed, the Proxxon was changed from a cutting to an abrasive
head of wires covered with plastic.
This was used to remove all the pencil guide marks and key the surface for
paint. A blow torch was produced along with a comforting water sprayer - just in
case. The design was lightly scorched to burn off the swarf and emphasize the
grain. Soot was then removed with a bristle or copper brush worked along the
grain.
Now it was time for painting. Liz has found acrylic paints
work well with two coats of matt paint brushed/sprayed onto the bare wooden rim
as a base covering followed by two different metallic shades 'dry brushed' on as
highlighting coats. She chose matt black for the base and for the highlights,
metallic green and silver.
 Dry
brushing requires very soft bristle brushes (looking like cosmetic blusher
brushes). The process is to dip into the paint so that just the tips of the
bristles picks up a little covering. Then brush most of it off on clean paper
taking care not to brush over paper already covered with some paint. When you
think you have brushed it all out, brush again on a spare piece of bare wood!
Now it's ready for the workpiece. Working carefully with no significant downward
pressure in a non-stop action, Liz caressed all the highspots until the base
coat slowly appeared to come alive. The brush did need to be reloaded so an
enormous amount of paper was used. Once one highlight colour has been applied
all over the design, the entire process is repeated with the other colour. The
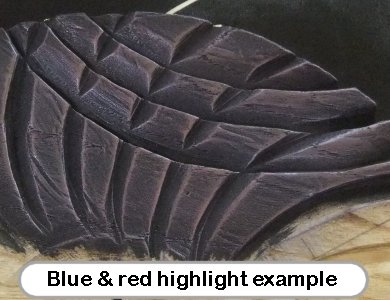
aim is to avoid one highlight to dominate the other. With our example of green &
silver, Liz was able to use the same brush but with certain combinations of
colour, (eg red & blue or blue & yellow) there was a danger that the highlight
effect will turn into single shade (eg purple, green) so a clean brush would
have to be used for each colour.
Dry
brushing requires very soft bristle brushes (looking like cosmetic blusher
brushes). The process is to dip into the paint so that just the tips of the
bristles picks up a little covering. Then brush most of it off on clean paper
taking care not to brush over paper already covered with some paint. When you
think you have brushed it all out, brush again on a spare piece of bare wood!
Now it's ready for the workpiece. Working carefully with no significant downward
pressure in a non-stop action, Liz caressed all the highspots until the base
coat slowly appeared to come alive. The brush did need to be reloaded so an
enormous amount of paper was used. Once one highlight colour has been applied
all over the design, the entire process is repeated with the other colour. The
aim is to avoid one highlight to dominate the other. With our example of green &
silver, Liz was able to use the same brush but with certain combinations of
colour, (eg red & blue or blue & yellow) there was a danger that the highlight
effect will turn into single shade (eg purple, green) so a clean brush would
have to be used for each colour.
Next, the bowl was hollowed out, sanded inside & out (to remove any overspill of paint), reversed using button jaws to convert the spigot to a foot, sander sealed all over and finally microcrystalline waxed. Click photo below for larger picture