Jason Breach
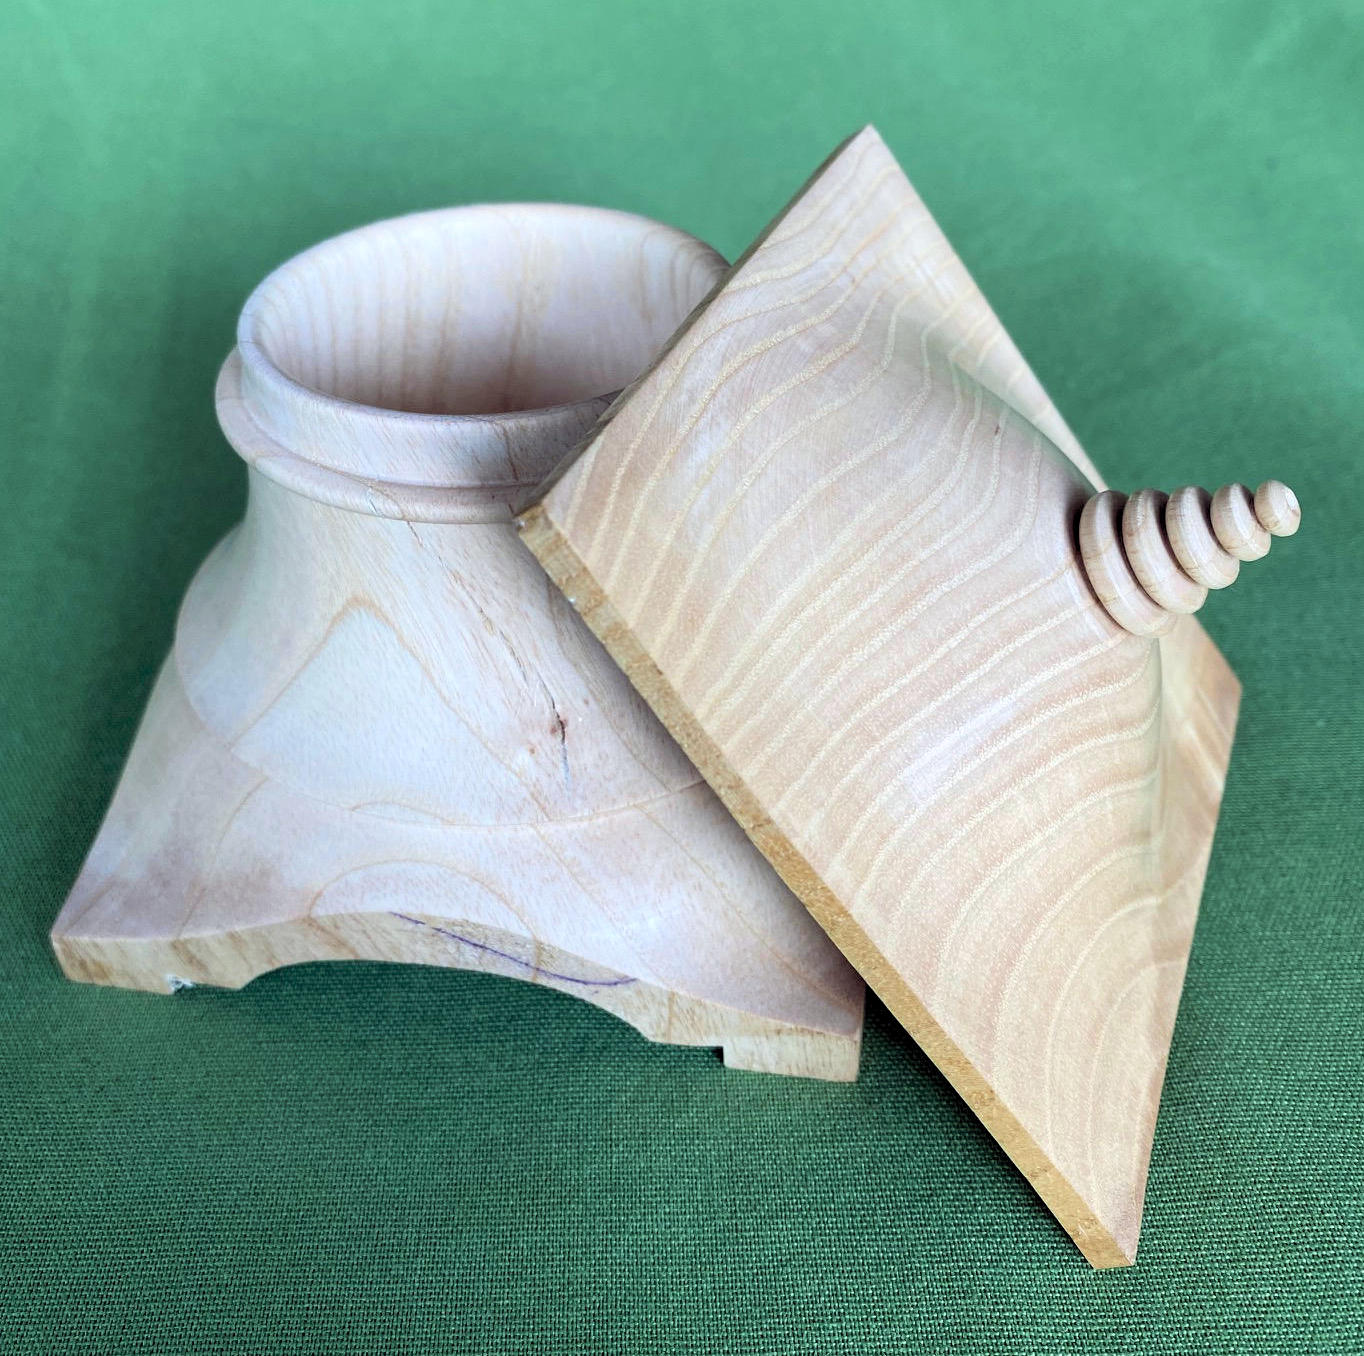
Demonstration of a Pagoda Box and associated tips on
techniques.
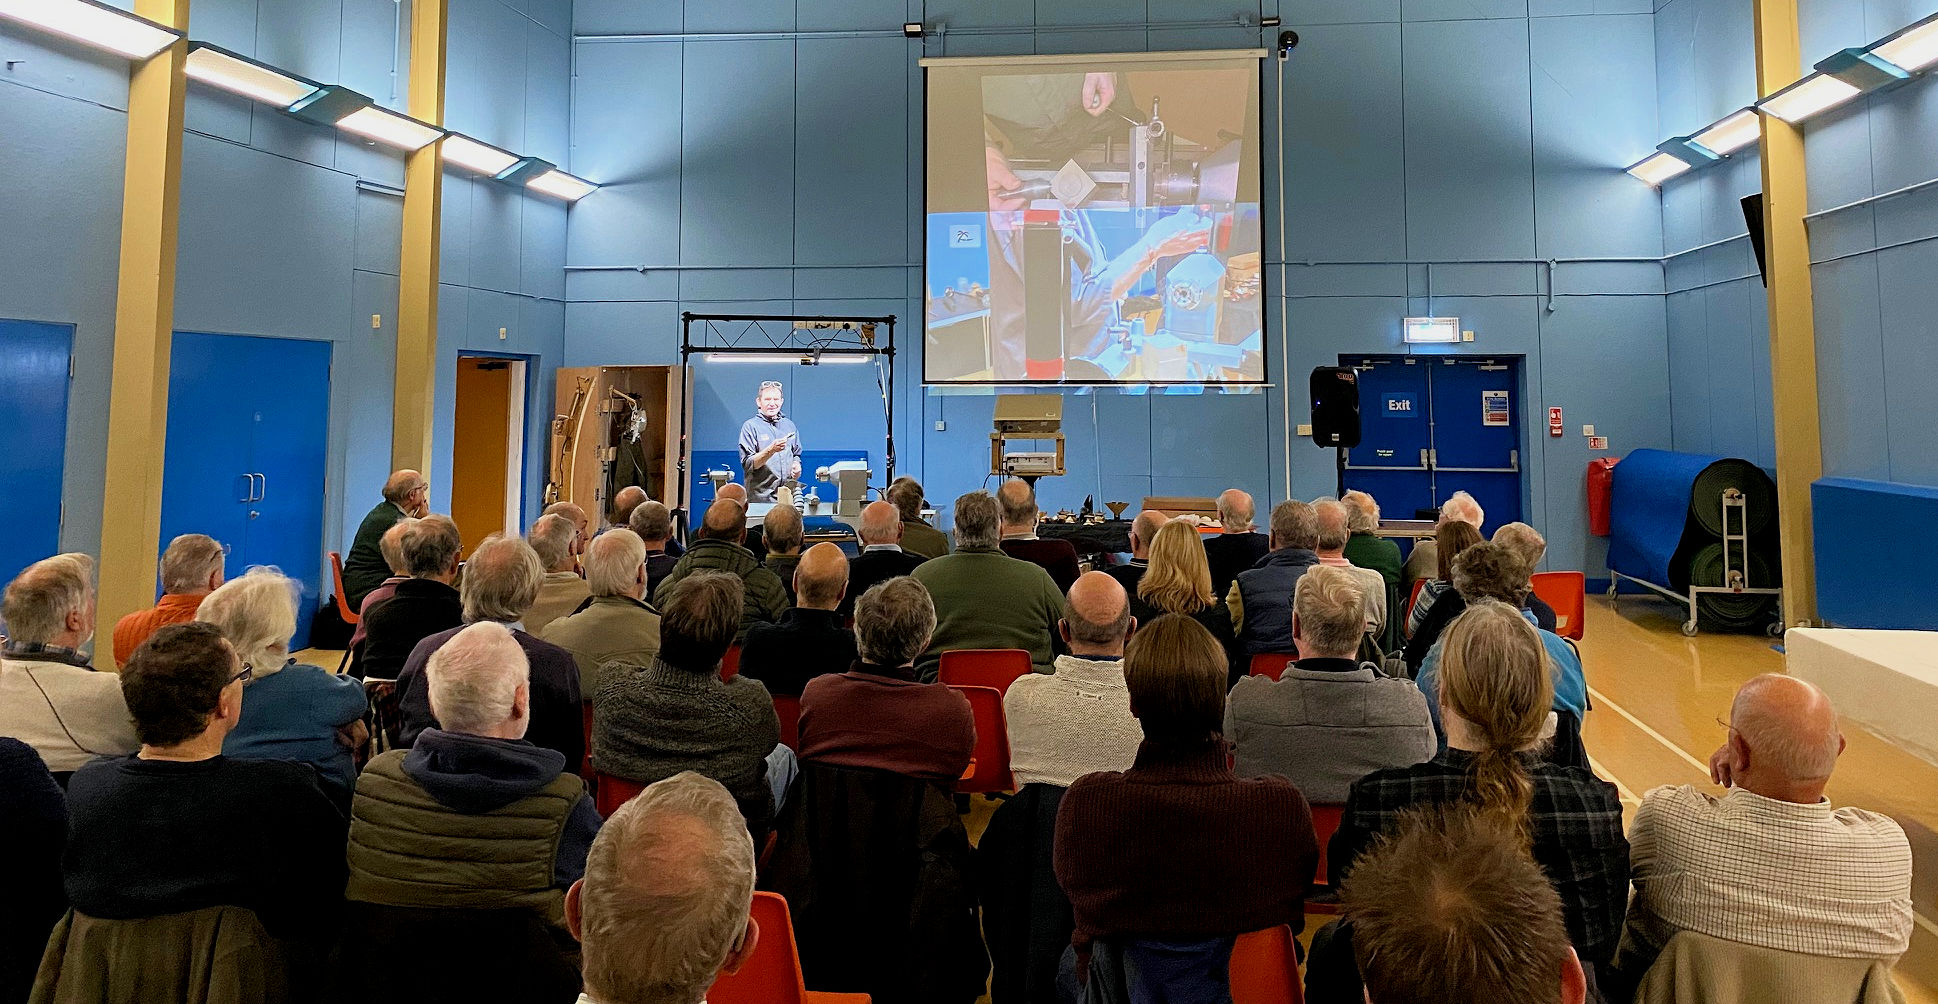
Thu, 16th November 2023 at MWCC Club Night.
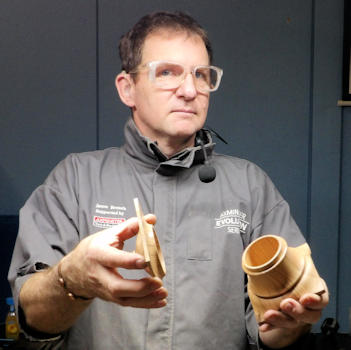
Although he is well known as a Skill Centre Tutor at Axminster Tools and probably familiar to most in that Company's 'Woodworking Wisdom' & 'How To' videos, Jason started wood turning at 12 years old; attended Buckingham College, High Wycombe and graduated with a BA (Hons) in Furniture Design & Management. He is best renown for producing boxes - normally half a dozen at a time - but he hasn't been videoed turning his own signature designed Pagoda Box because he tends to keep that for demonstrations like tonight.
(click any below for close up view)
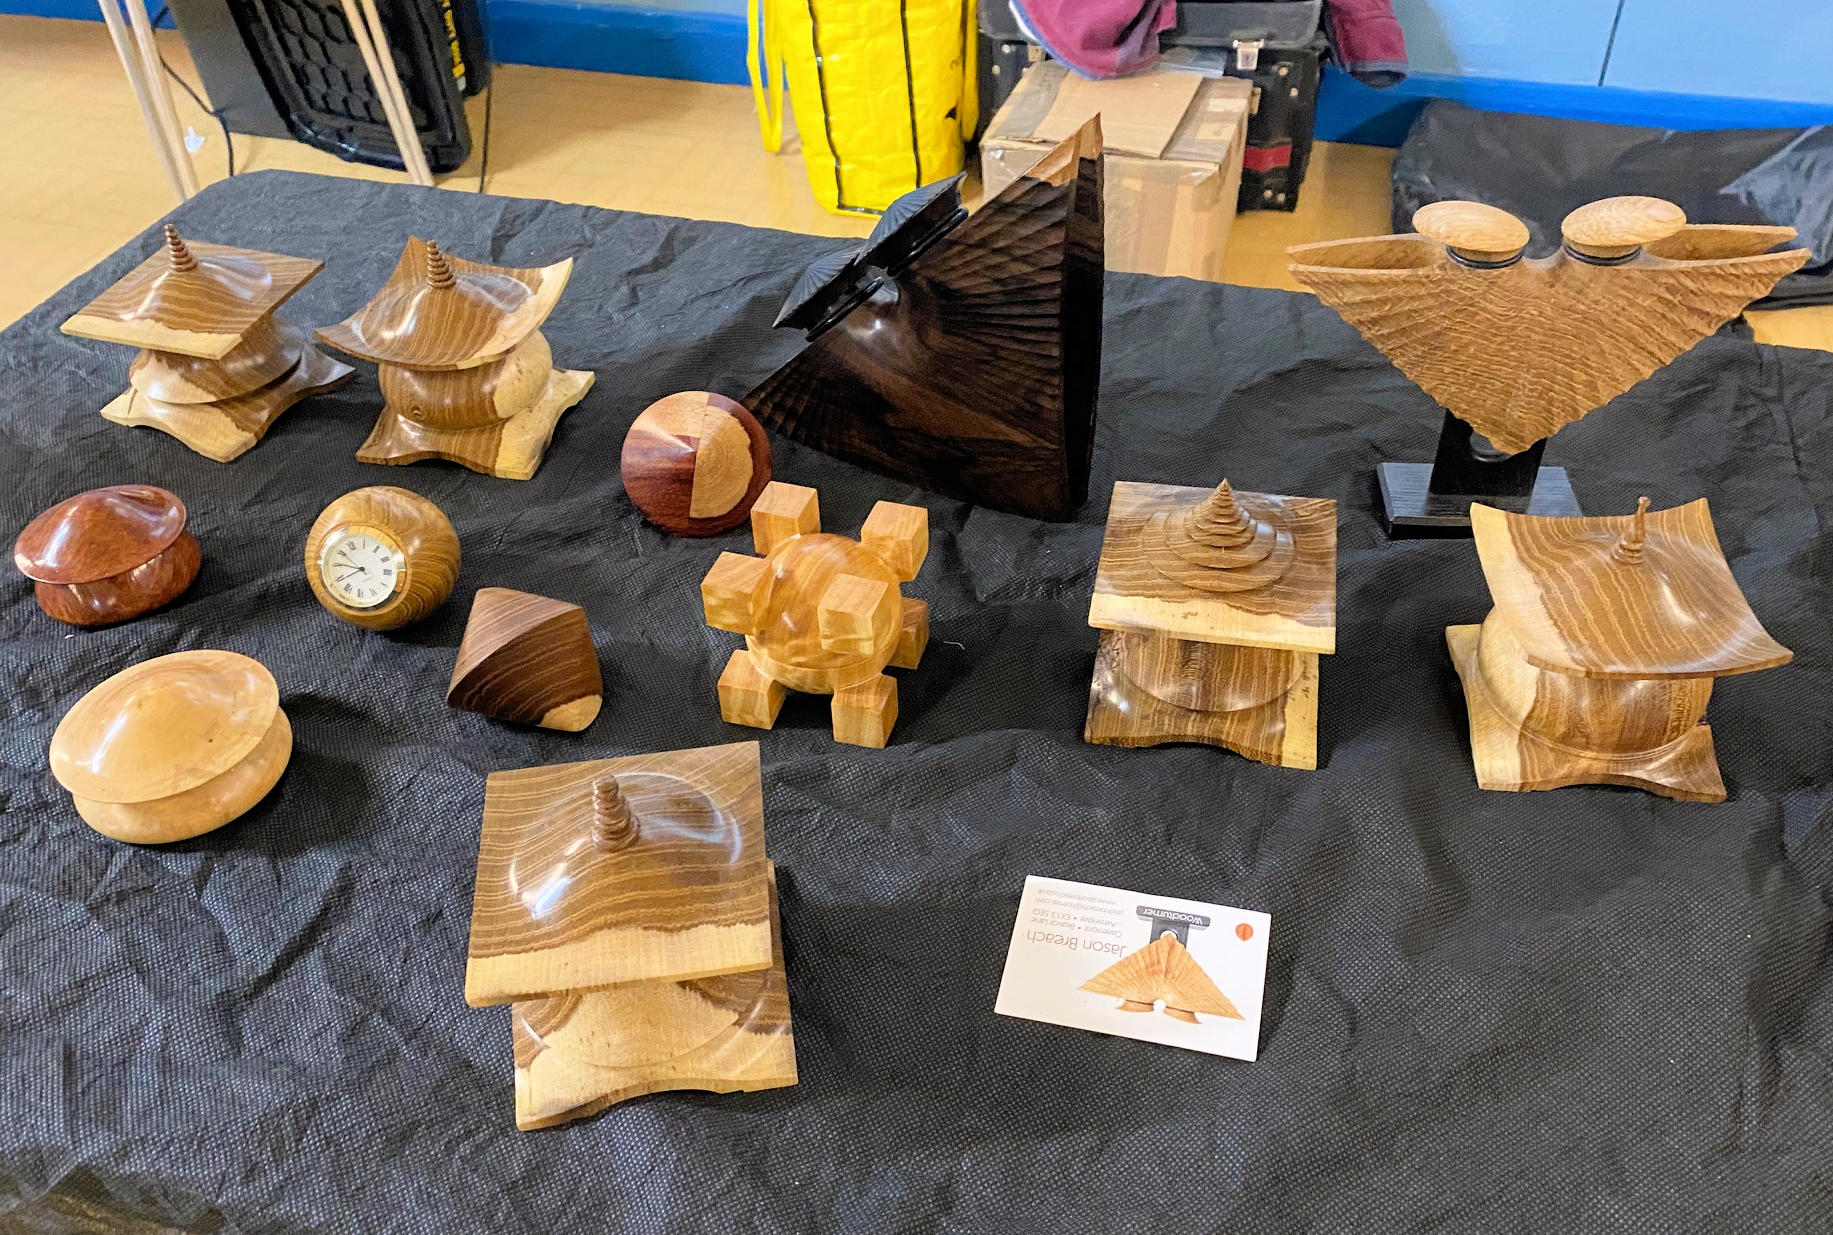
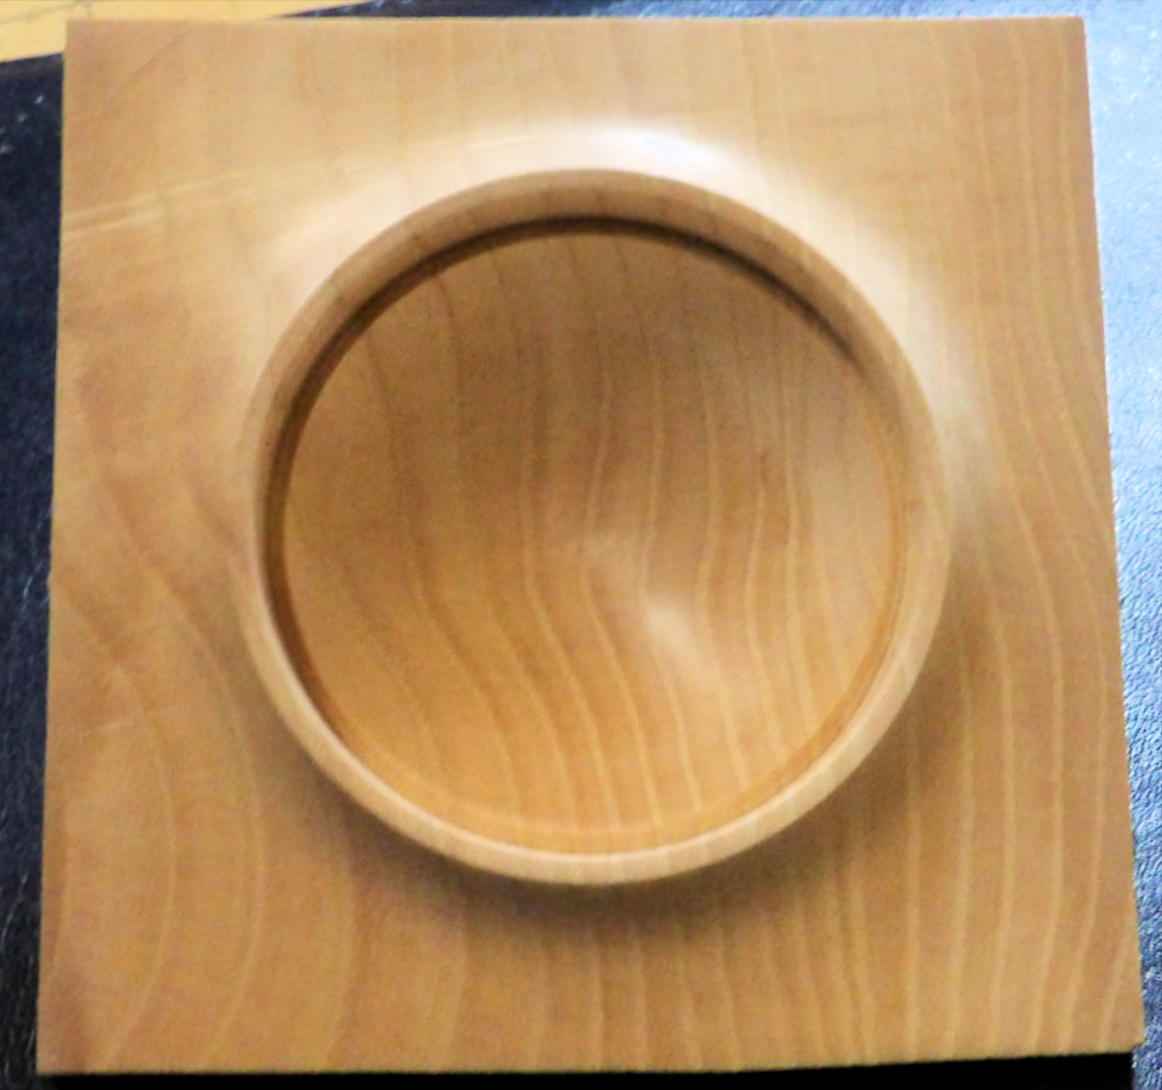
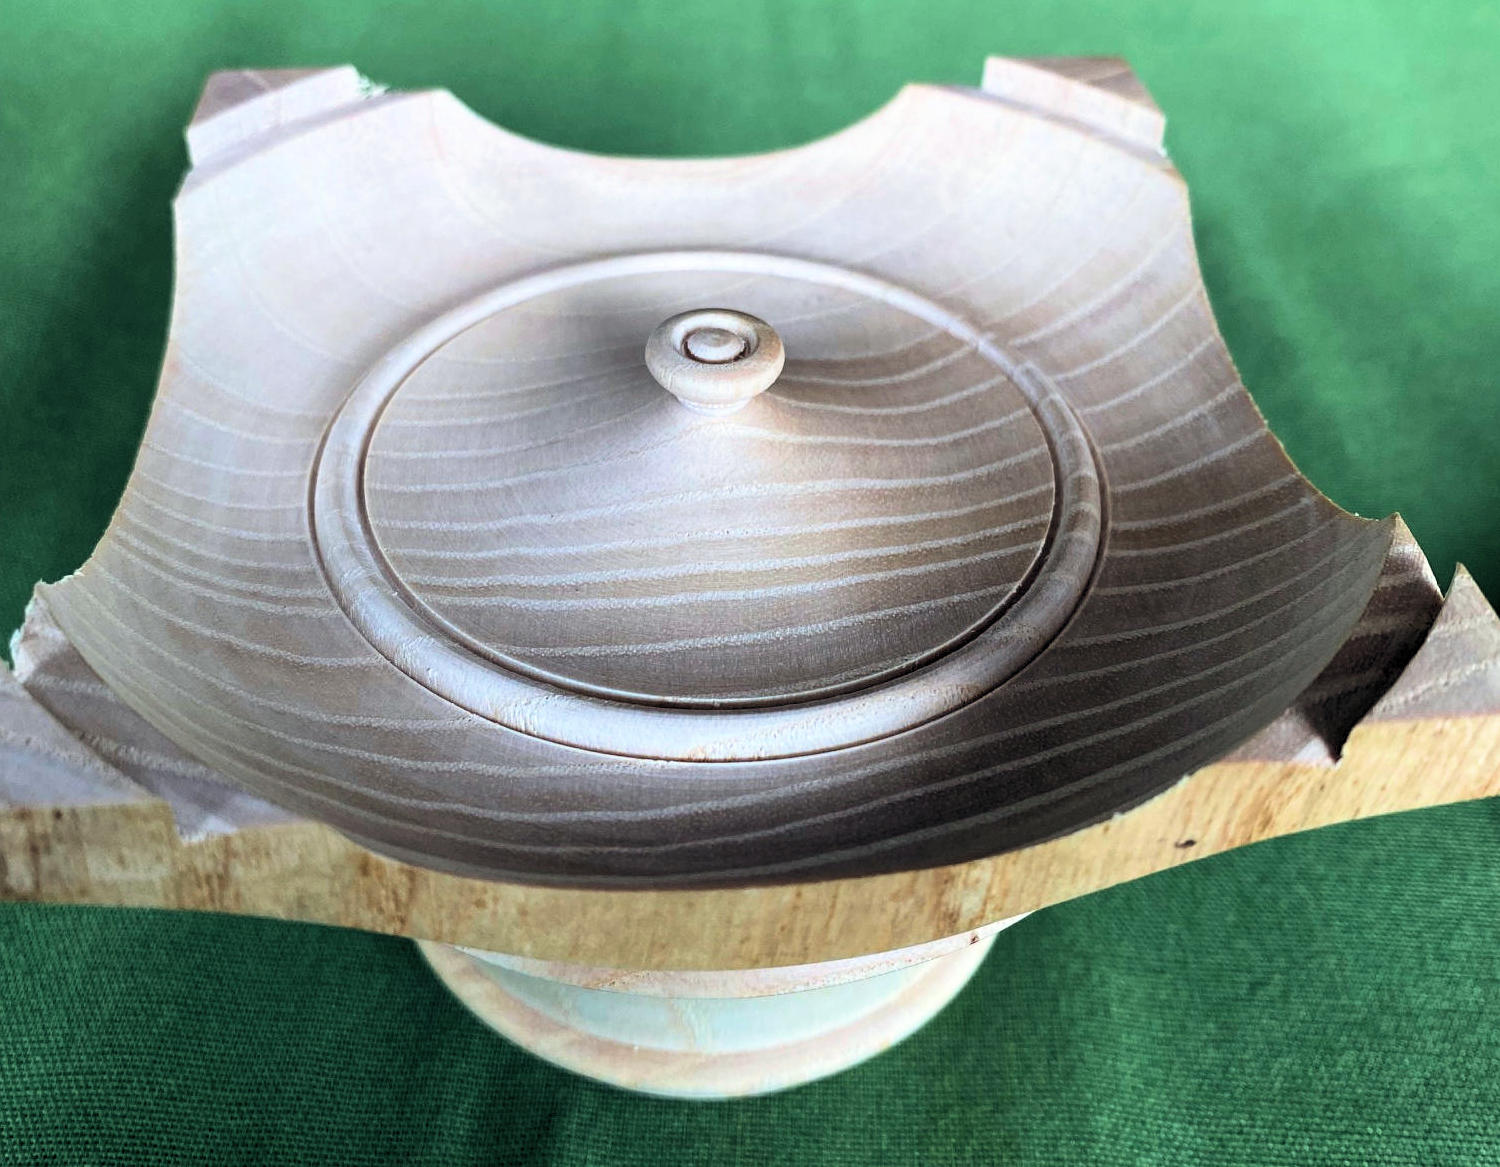
Jason has always marvelled those woods that have a marked
contrast of colours between heartwood and sapwood. Pagoda Boxes are made from
square sections, which is a great way of giving prominence to that difference of
colour and weirdly (so Jason admits) his little Pagodas have got him recognized
around the world.
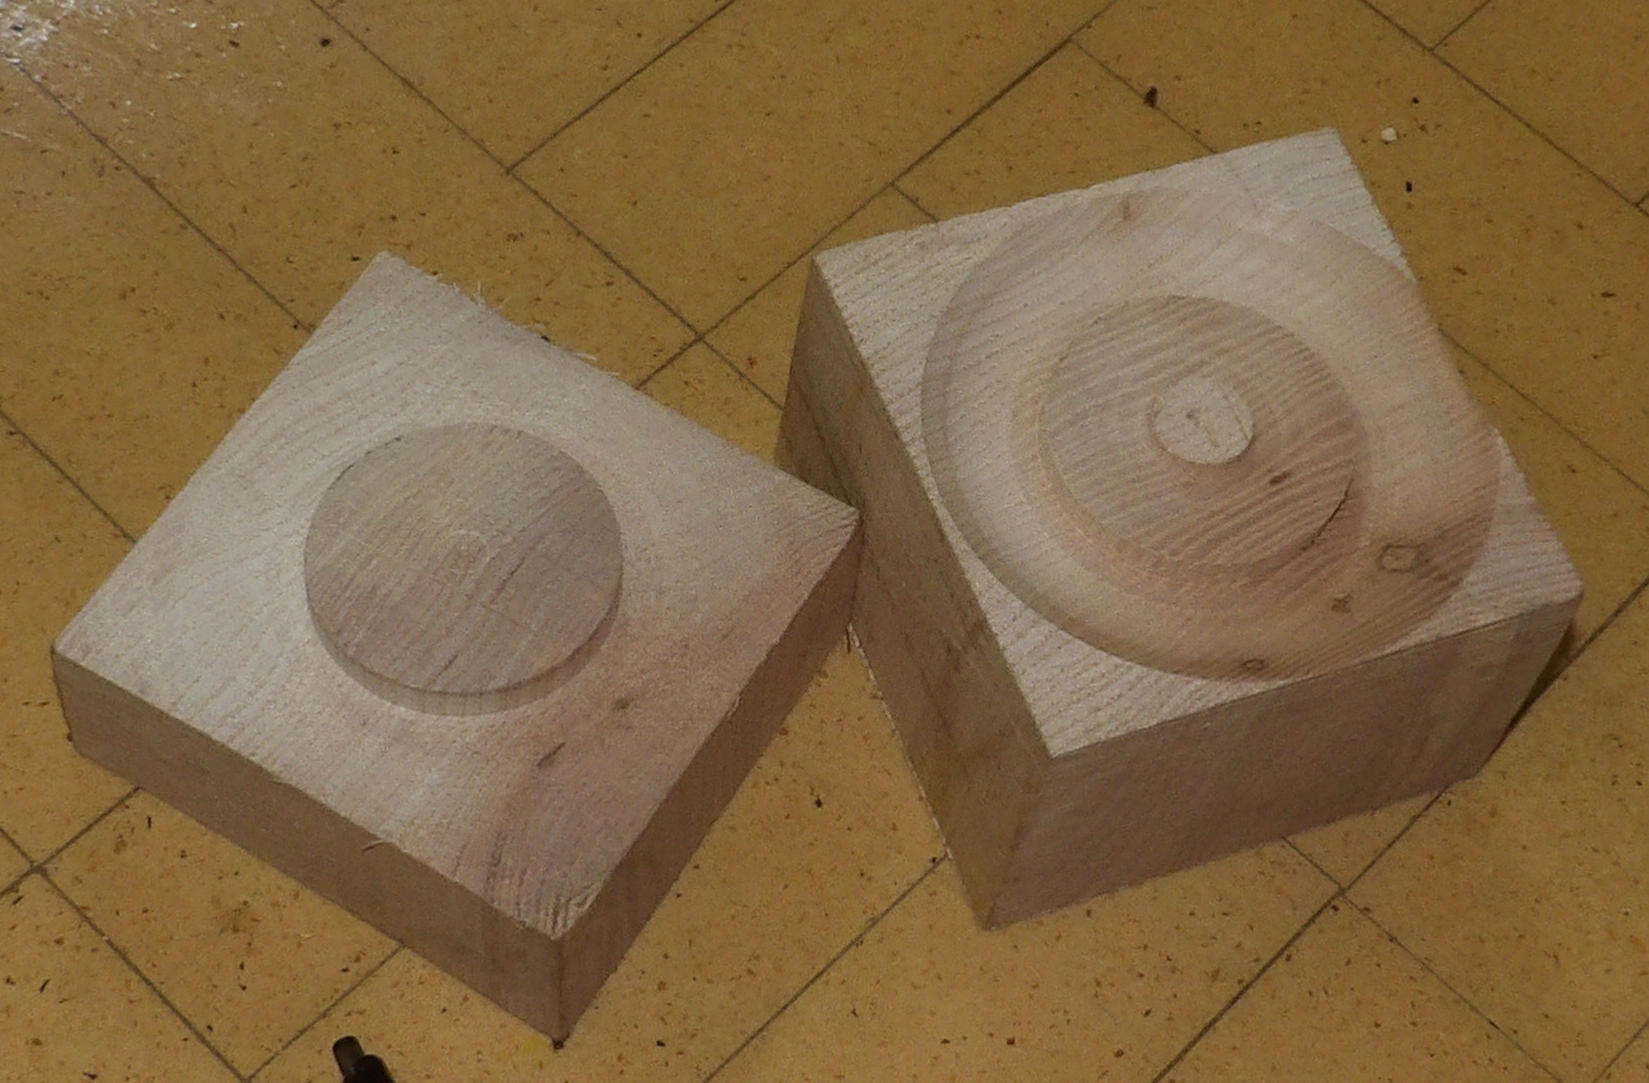
Wood blank must be dry, well seasoned without any cracks and rough sawn into
square cross section lengths, of which each will have 40% for its lid
(incorporating finial) and 60% for base & foot.
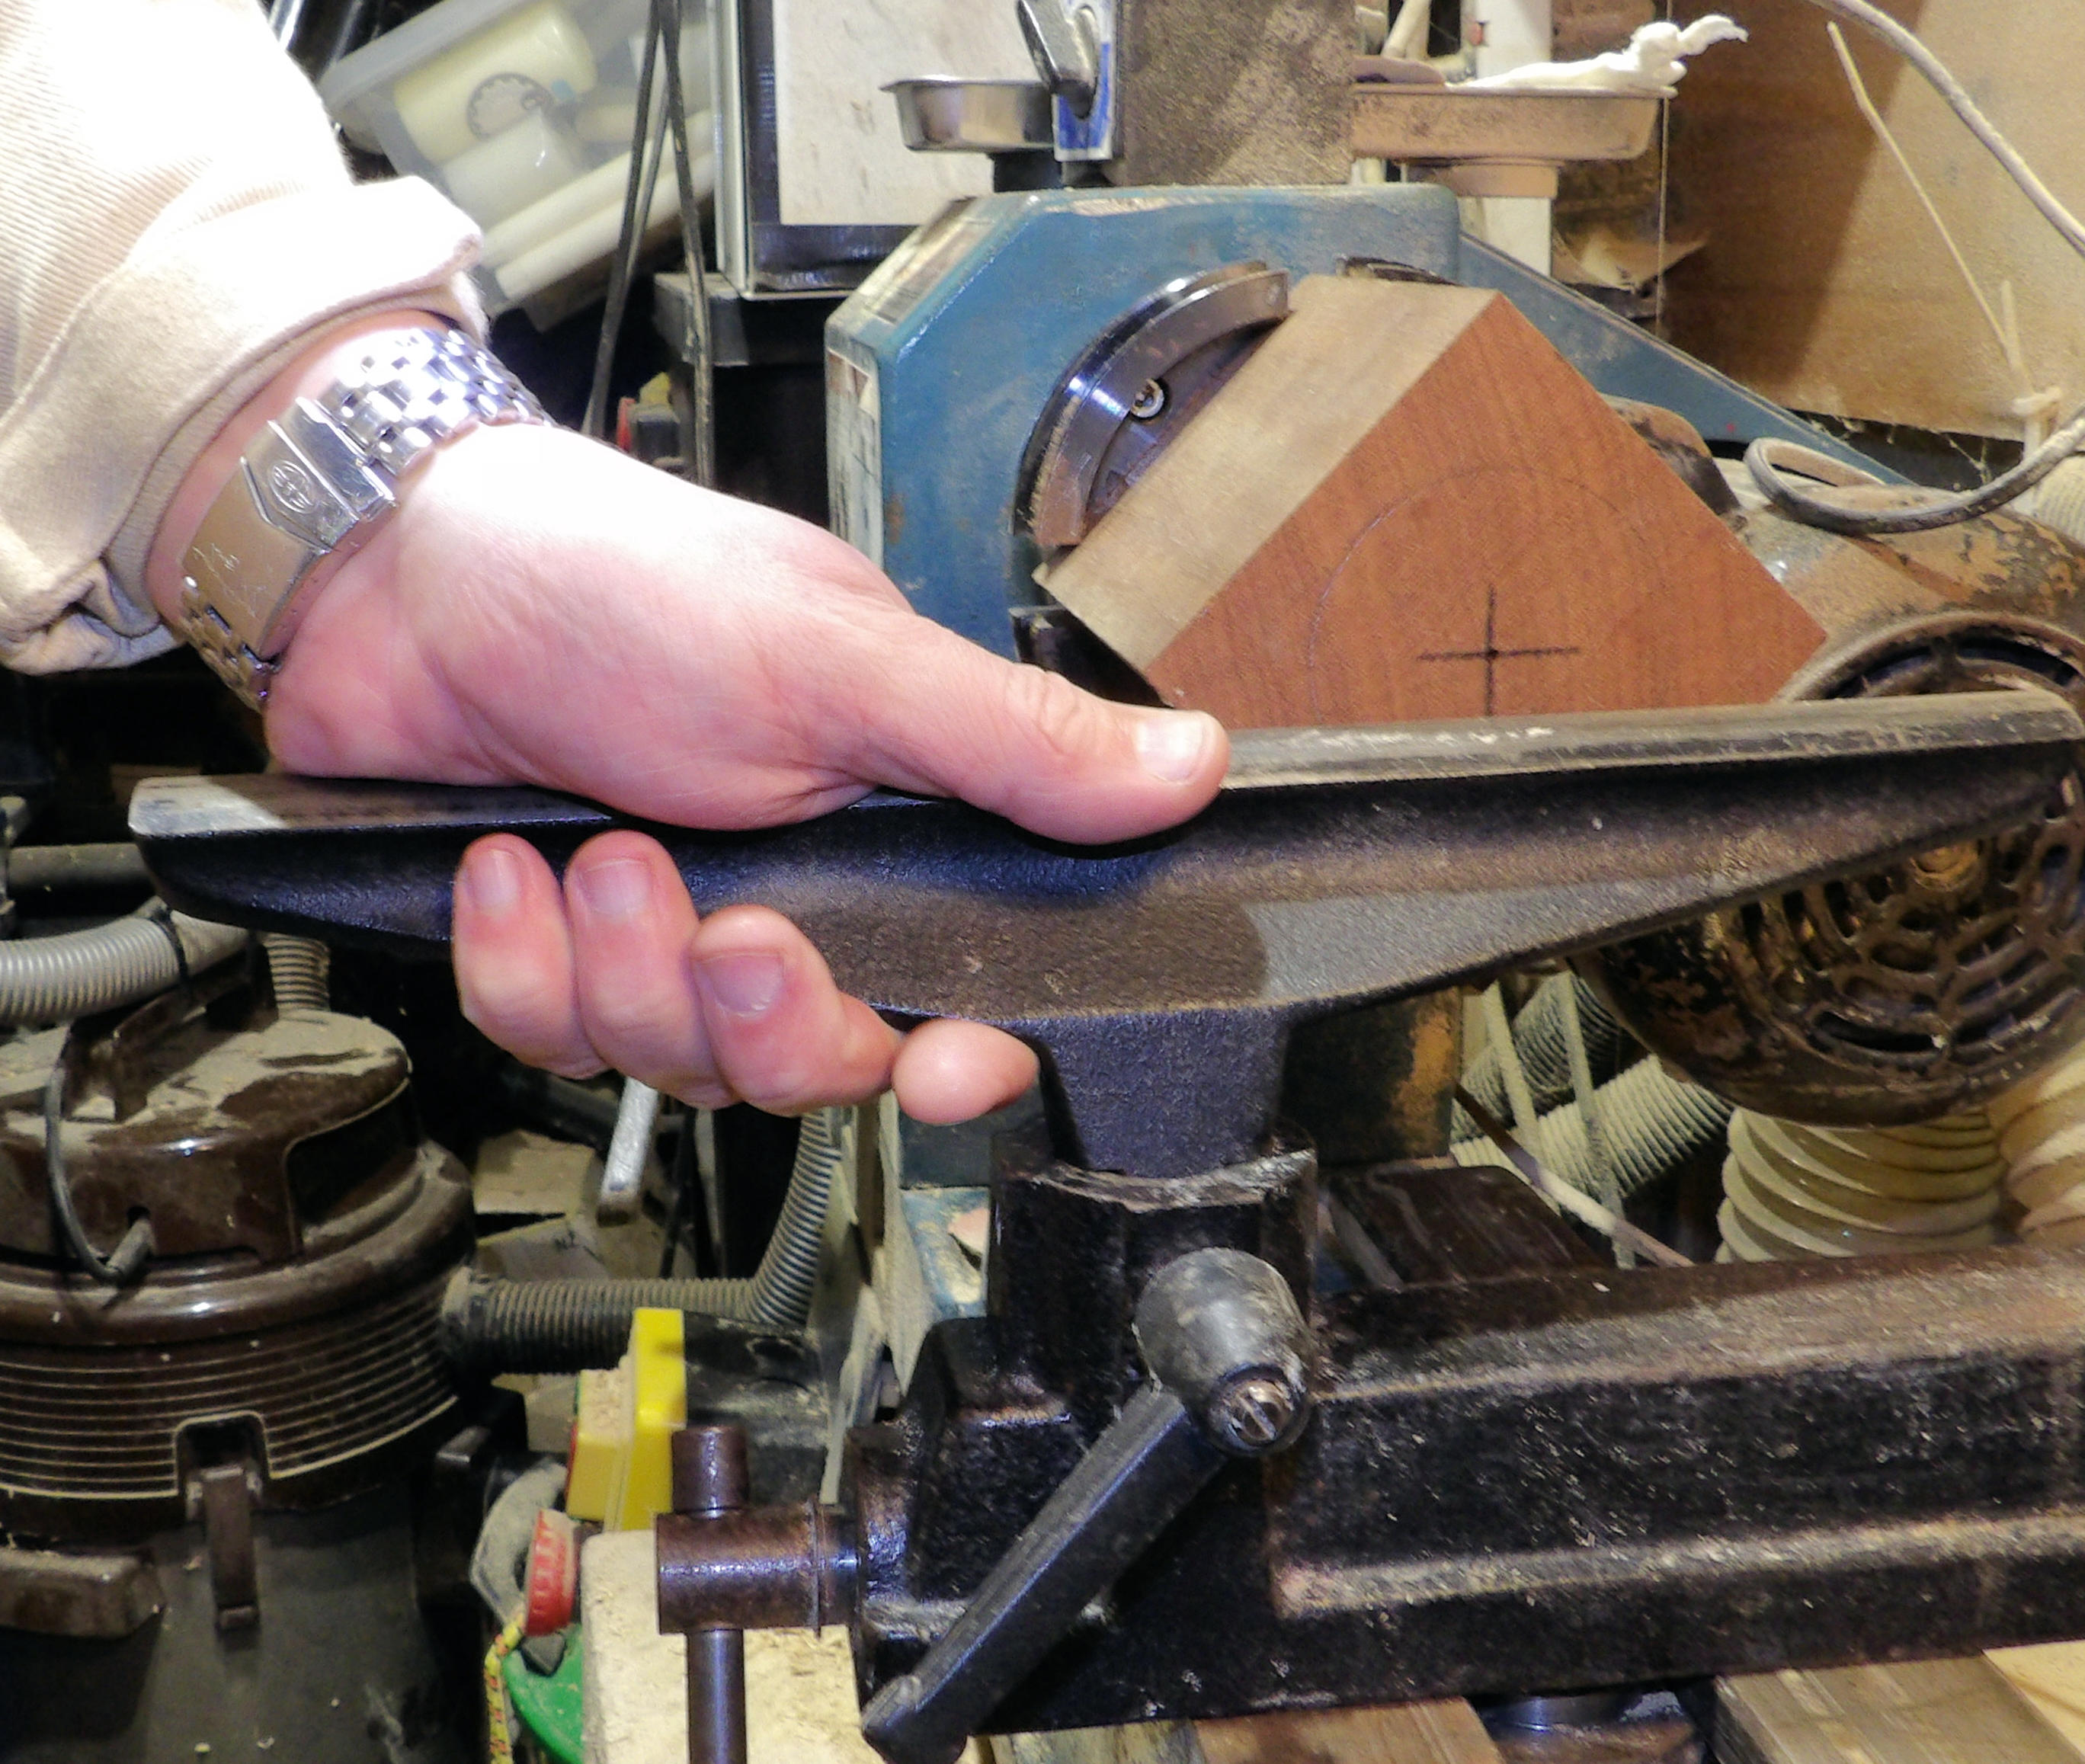
Having selected the end grain sides, these two opposite faces had their centres
marked.
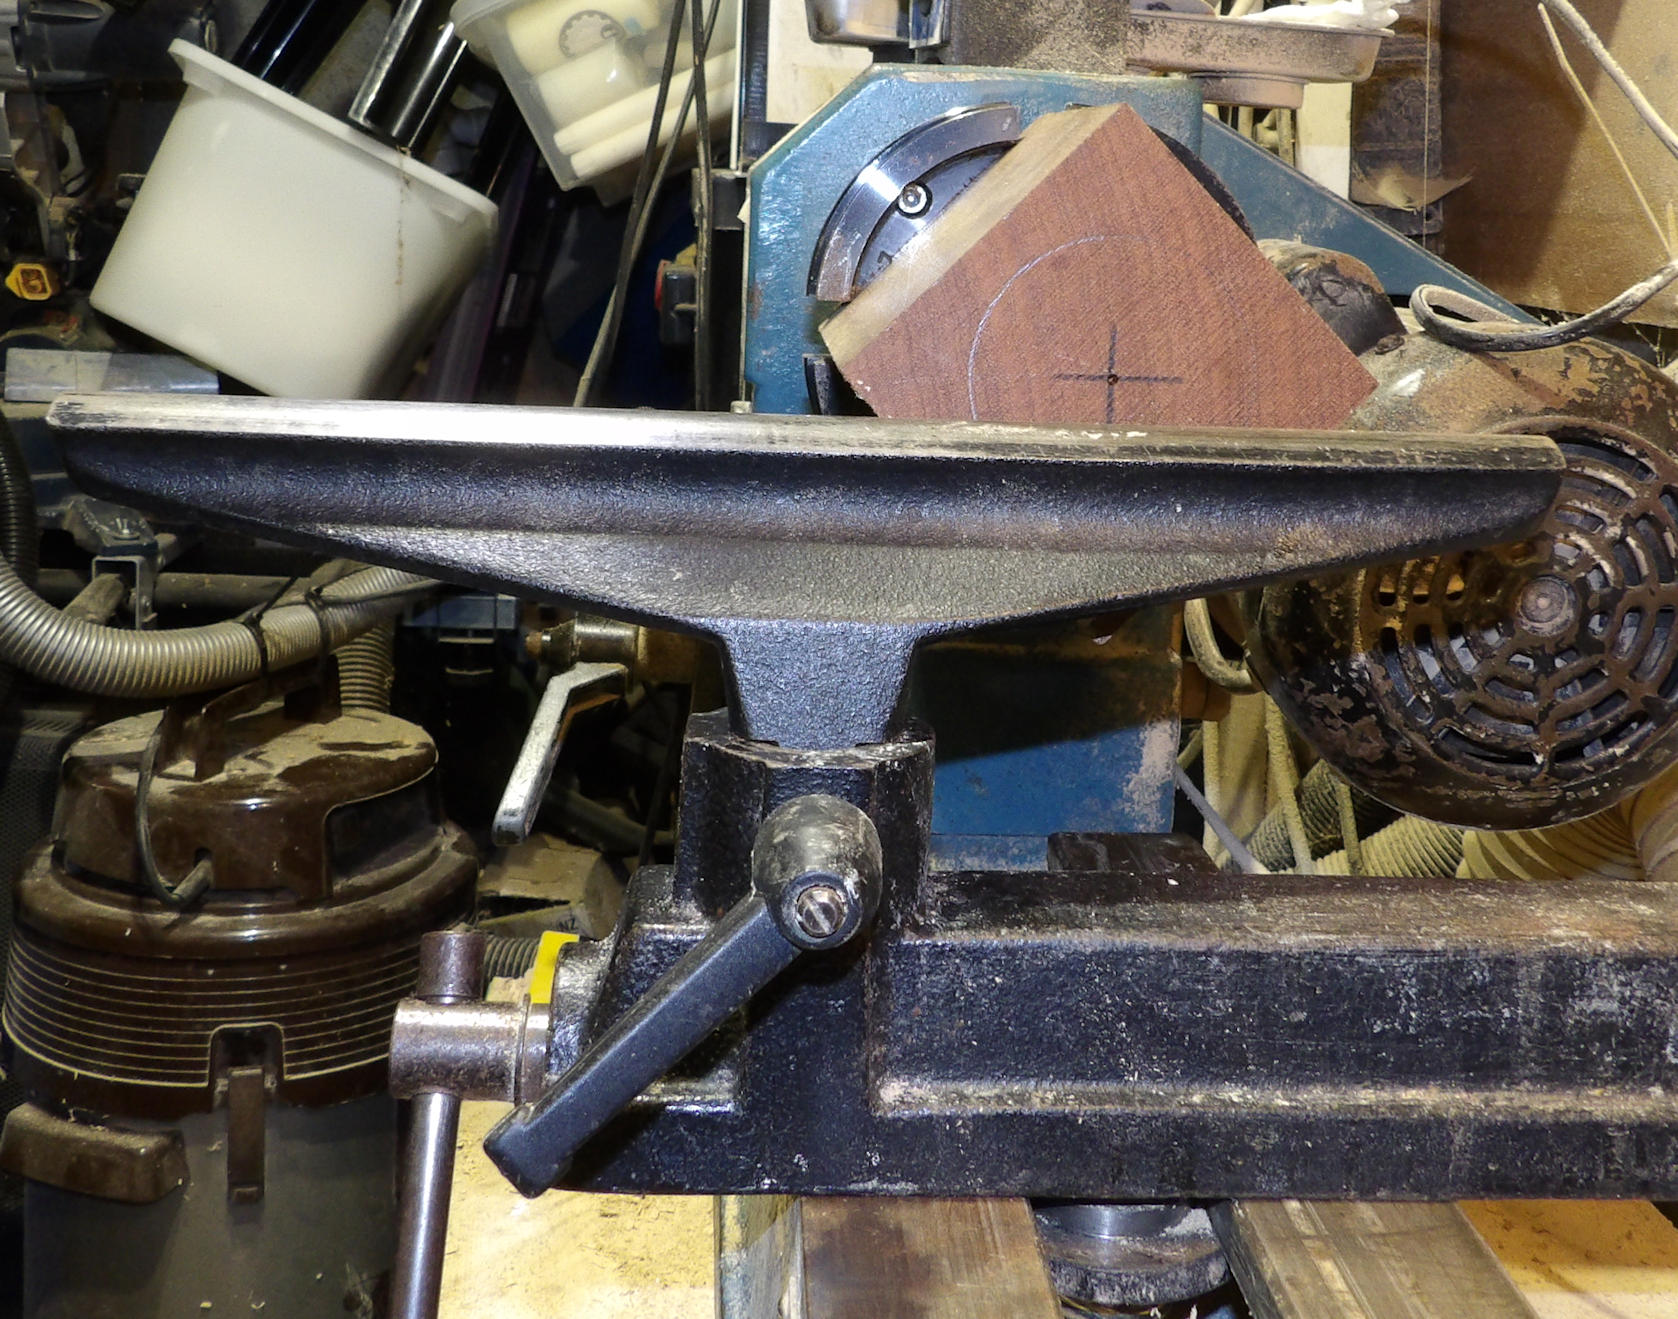
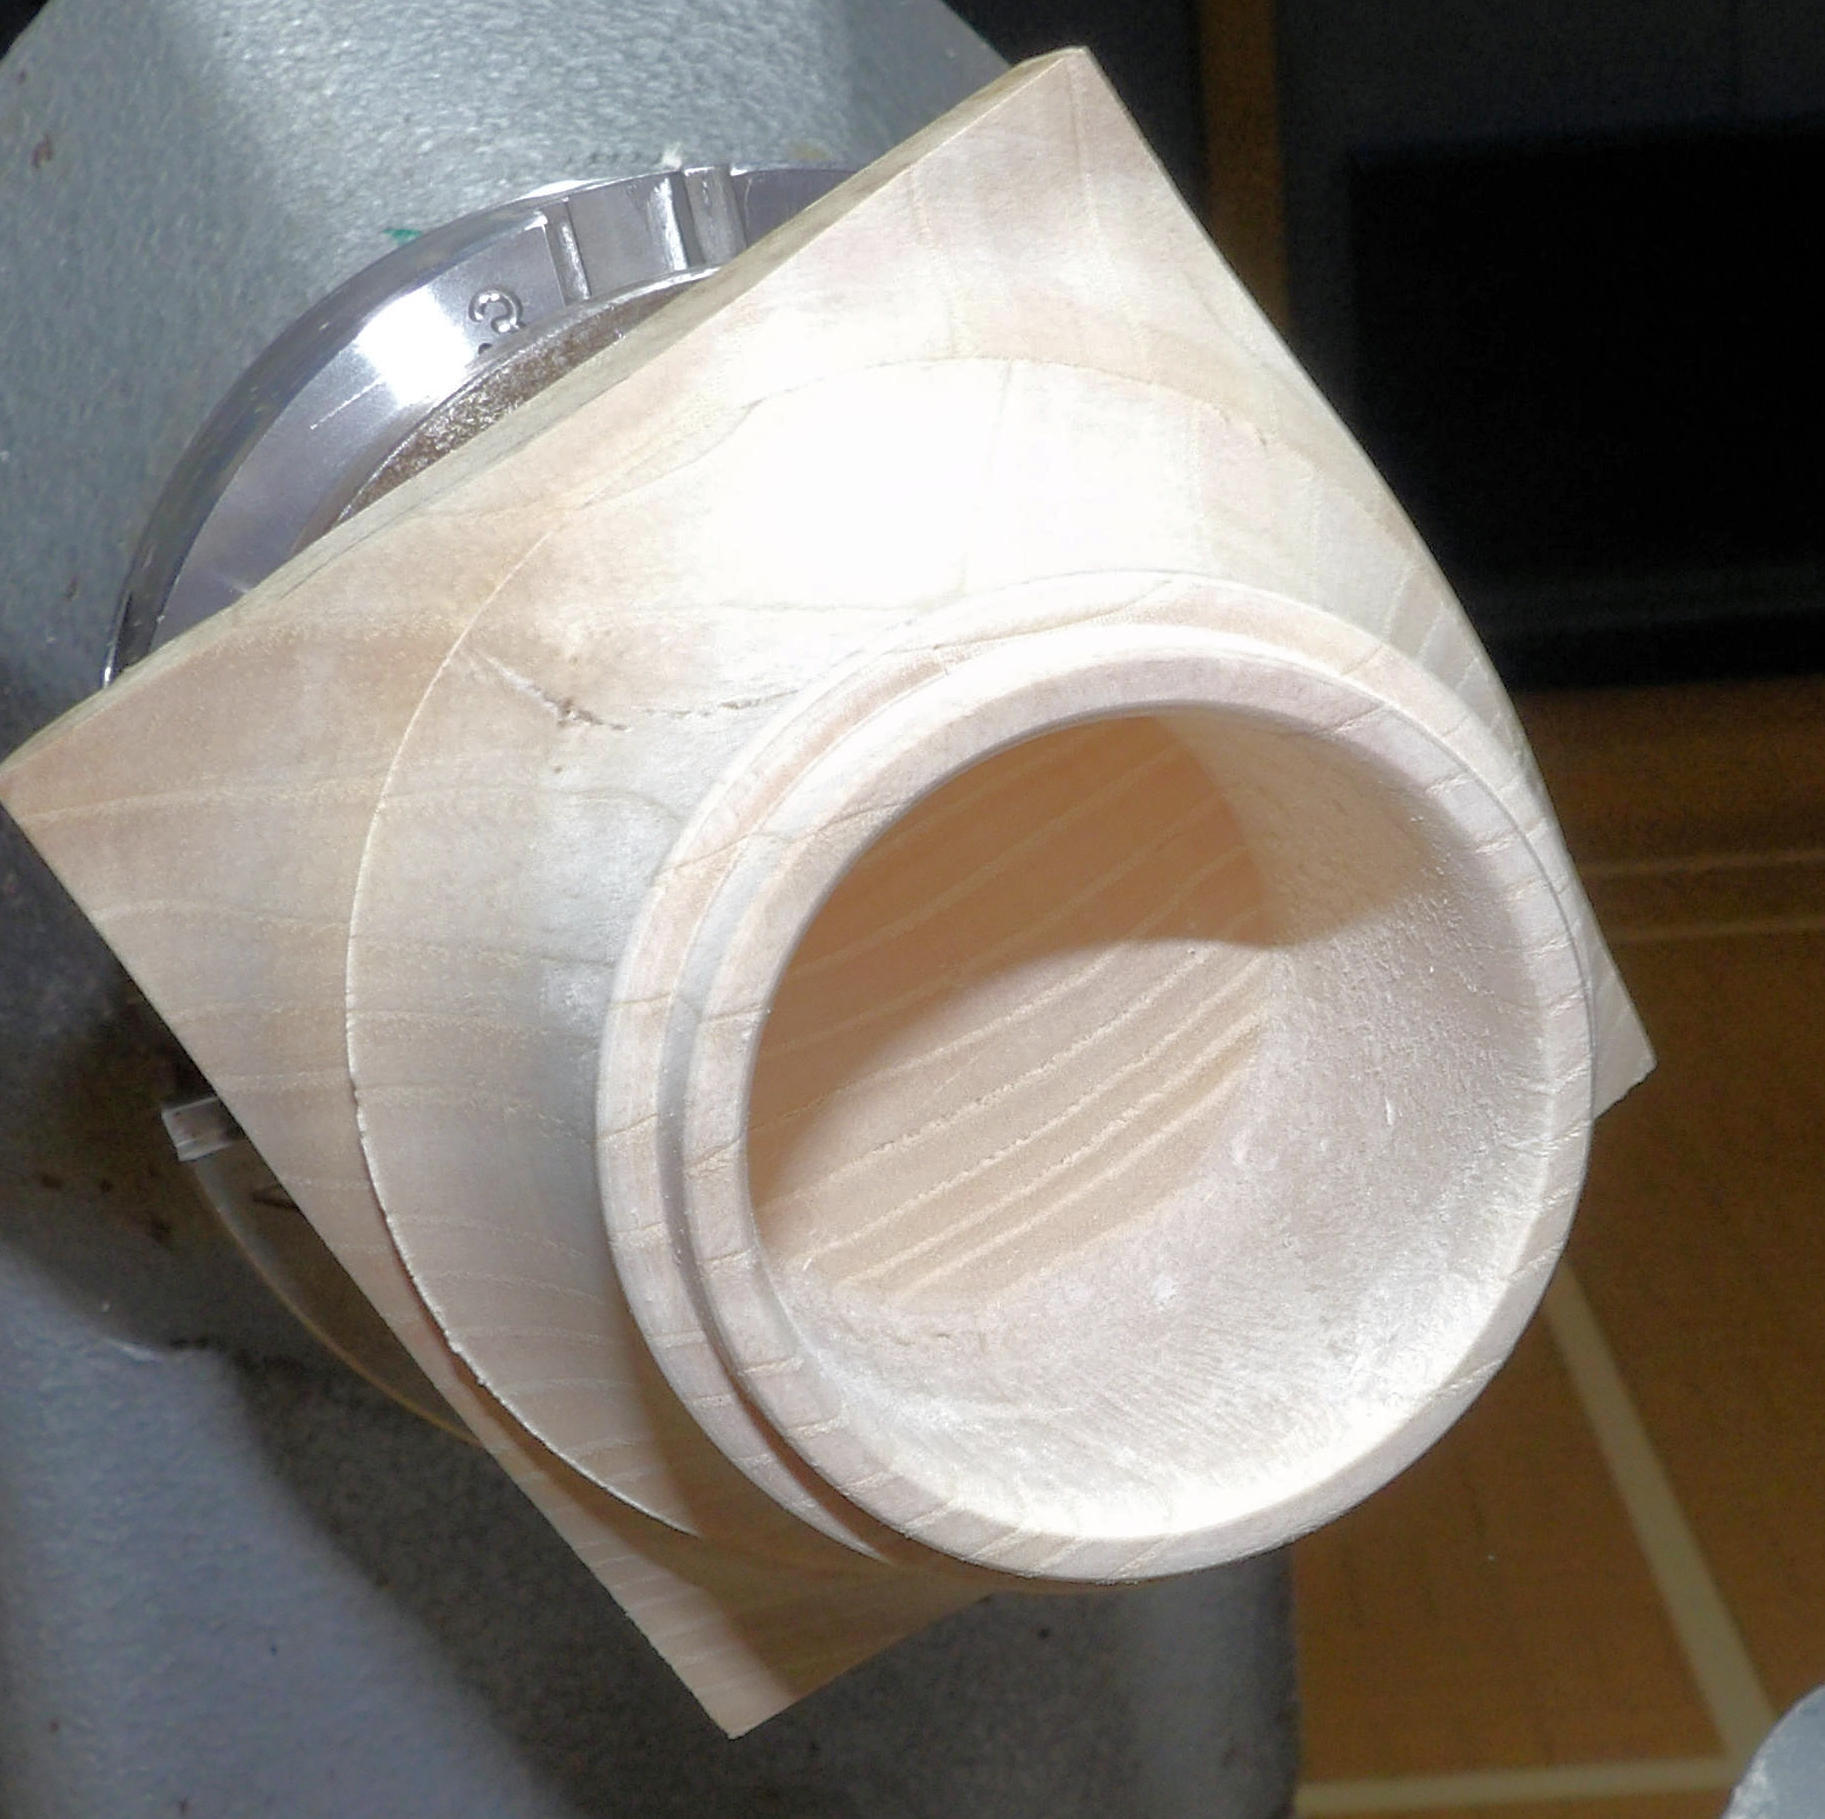
Jason had prepared a blank of Ash as such with both ends squared off and had
drawn a circle on both ends to the diameter of his gripper chuck.
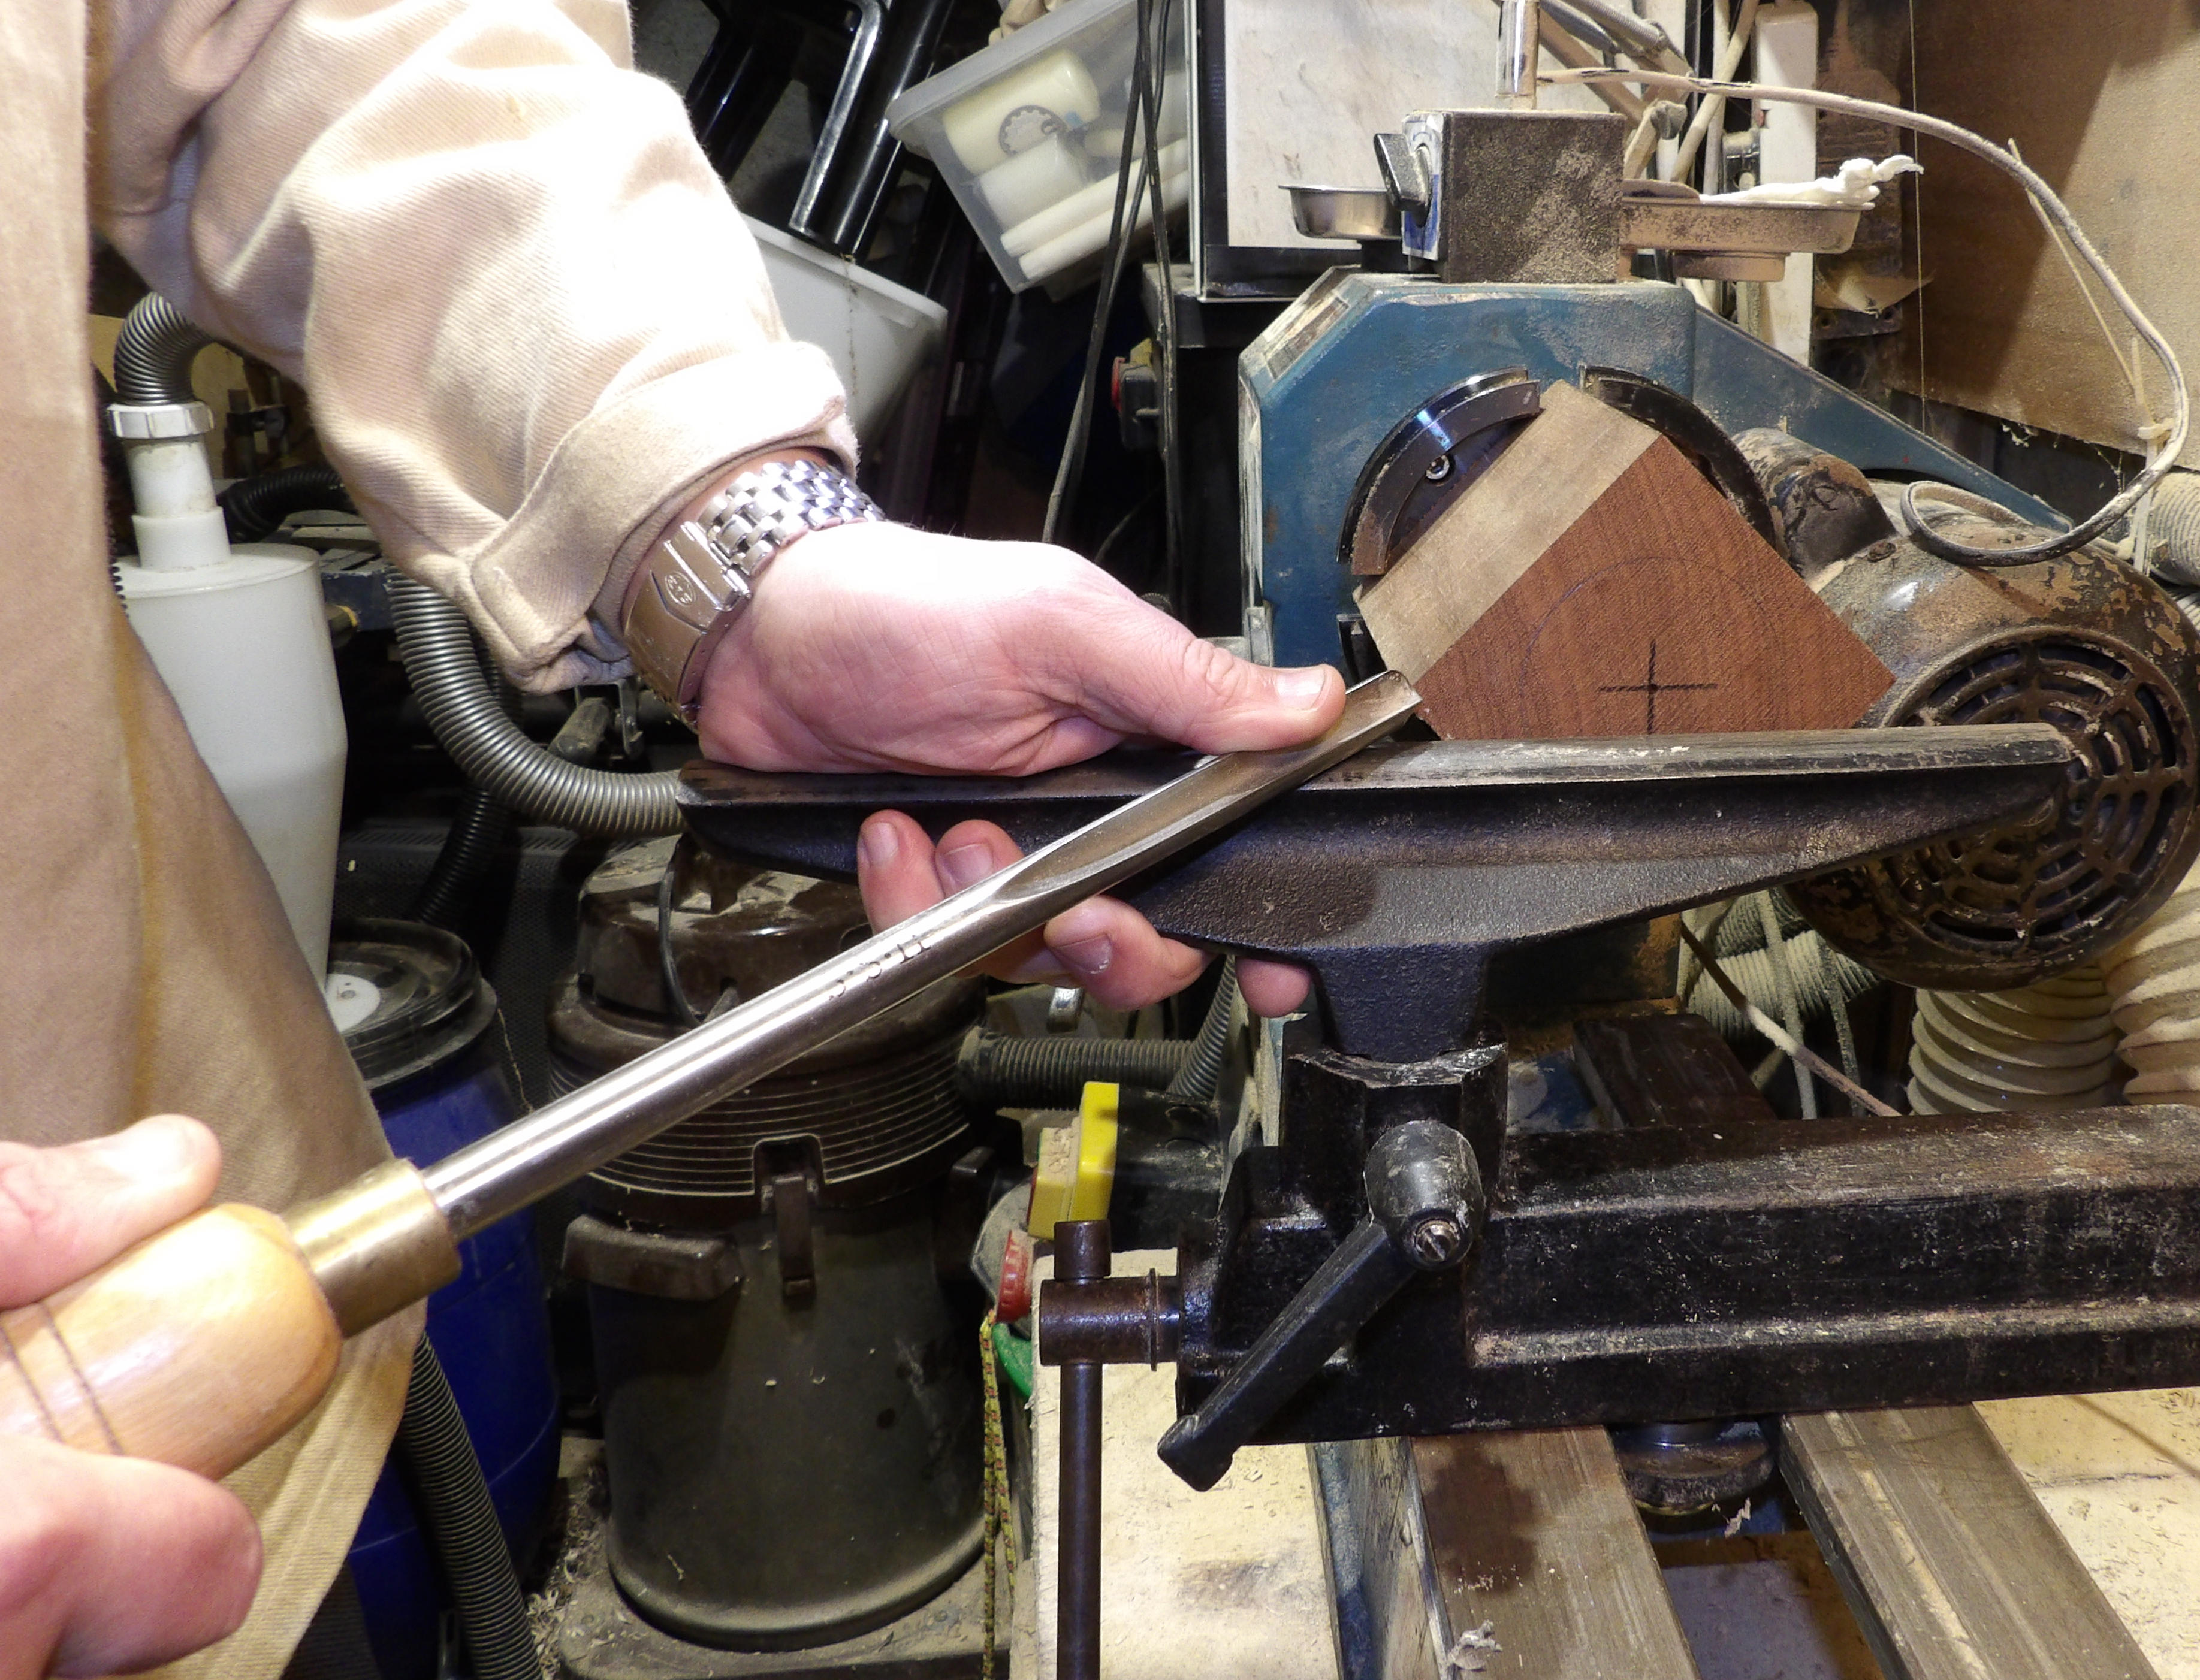
 Jason favours using a Pro Drive centre for the headstock and a Revolving Ring
centre for the tail stock because ring centres help avoid the wood splitting
down the endgrain which can often occur with a standard centre tip.
Consequently, the fibres won't be damaged so there won't be any need to use
superglue to reinforce spigot centres prior to turning a thin decorative
finial/feature.
Jason favours using a Pro Drive centre for the headstock and a Revolving Ring
centre for the tail stock because ring centres help avoid the wood splitting
down the endgrain which can often occur with a standard centre tip.
Consequently, the fibres won't be damaged so there won't be any need to use
superglue to reinforce spigot centres prior to turning a thin decorative
finial/feature.
Jason's method of hollowing out was first drill a hole to depth, then hook
out with bowl gouge's flute at about half past 9 o'clock position from the
centre outwards (with the handle kept level throughout) until near final depth.
This use of some the side wing produced large shavings and removed the bulk very
quickly if perhaps a little ridged without the bevel being worked. He then
used a bevel cut from the outside towards the centre with the flute at 3
o'clock to engage the bevel before he opened the flute and moved the handle
to maintain bevel contact throughout the cut and which produced very fine shavings.
 This bevel cut has the tendency to blunt the edge quickly as it cuts across the
endgrain so another benefit of Jason's method, apart from being quicker, is that
the less bevel cut passes made, the longer the gouge remains sharper.
This bevel cut has the tendency to blunt the edge quickly as it cuts across the
endgrain so another benefit of Jason's method, apart from being quicker, is that
the less bevel cut passes made, the longer the gouge remains sharper.
Next he used a negative rake round nose scraper which must be kept level with
a light touch to keep the scrape controllable - any up or down movement of the
handle will not only change the cut angle but also the radius of the curve.
Indeed, Jason believes 'scraper' a misleading description as when the tool is
kept sharp with a diamond and handled correctly, it behaves so smoothly.
He finished with 150/240/400 abrasives; although he was putting his hand inside
the hollow, it was less than an inch and he used his left hand to support his
right wrist. The sanding couldn't be completed after the next precision cut else
that cut wouldn't be quite as precise as we wanted!
Jason used an Oval Skew to produce a parallel cut for the box base to push into.
His Skew had an asymmetric grind (ie underside rounded with the cutting side
hollow) which provides more metal strength to the cutting edge - a trick learnt
from his furniture making days. He prefers this Skew without a handle as he
finds it lighter and more delicate to hold which leads to finer control of the
cut.
With aged eyes and less sensitive fingertips these days, Jason gauged whether
his cut was dovetail, taper or straight by carefully sliding a Spring Inside Calliper over
its full depth.
The completed under lid surfaces now needed a finishing wax, but before the wax is applied, he had to seal with cellulose sander sealer - cellulose is preferred over acrylic because the former dries so much quicker. Jason applied it on a cloth with the lathe turning but kept his cloth moving. It was touch dry within 30 seconds but he waited a few more minutes before applying microcrystalline wax on steel wool or grey/white Webrax and buffing with the lathe turning. The rest of the lid would be completed once the box base has been made to fit the lid.
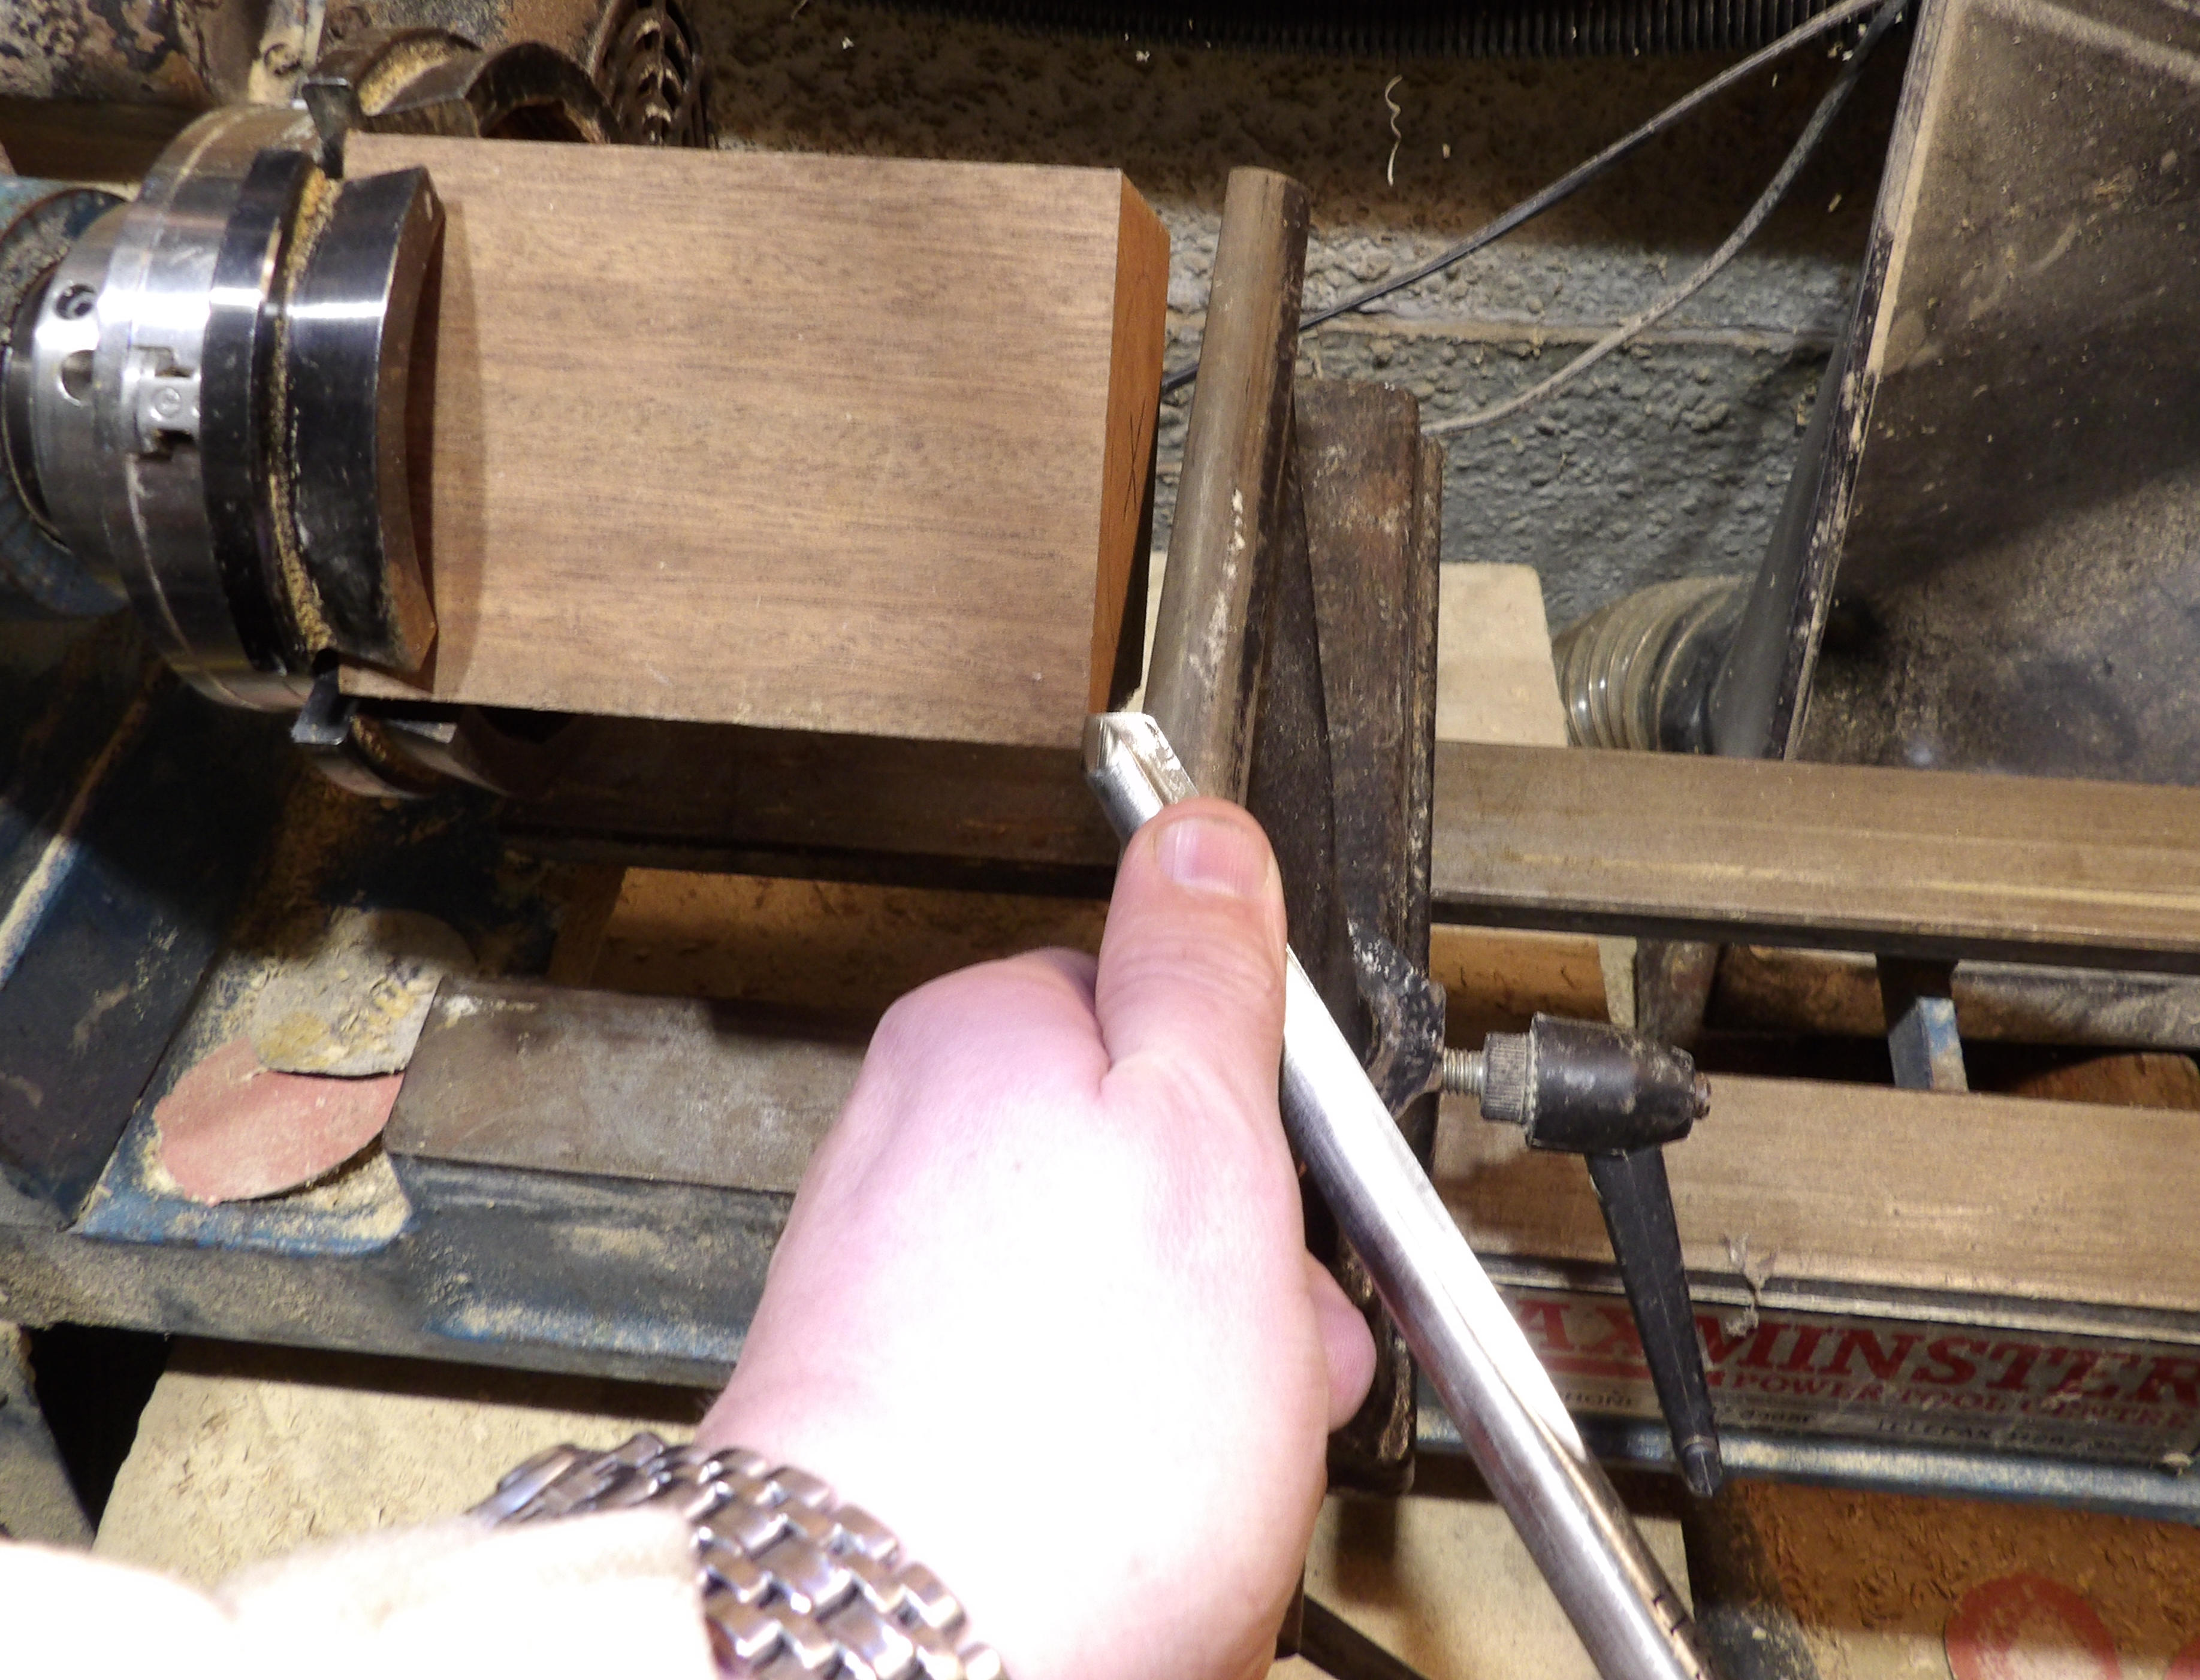
Now similar work was performed on the outside of the box base with it mounted
in the chuck until Jason got to making the fit for the lid. With careful
measuring (because there was very little margins for recovering from errors) he
turned a spigot deliberately with a slight taper so that when he twisted the lid
on, it left a shiny crush mark on the spigot where it gripped, which he used as
a guide to make a square cut.
There was discussion as to whether a lid should be tight or loose. It came down
to whether one hand or both hands needed to be used. The Pagoda Box is primarily
ornamental and merits to have two hands to line the lid up with its base. Jason
recounted that he had once quipped to his audience at a USA demo that if one was
going to keep Viagra there, then perhaps a loose fit would be better.
Unfortunately, he had overlooked that Americans have a different sense of humour
to the British
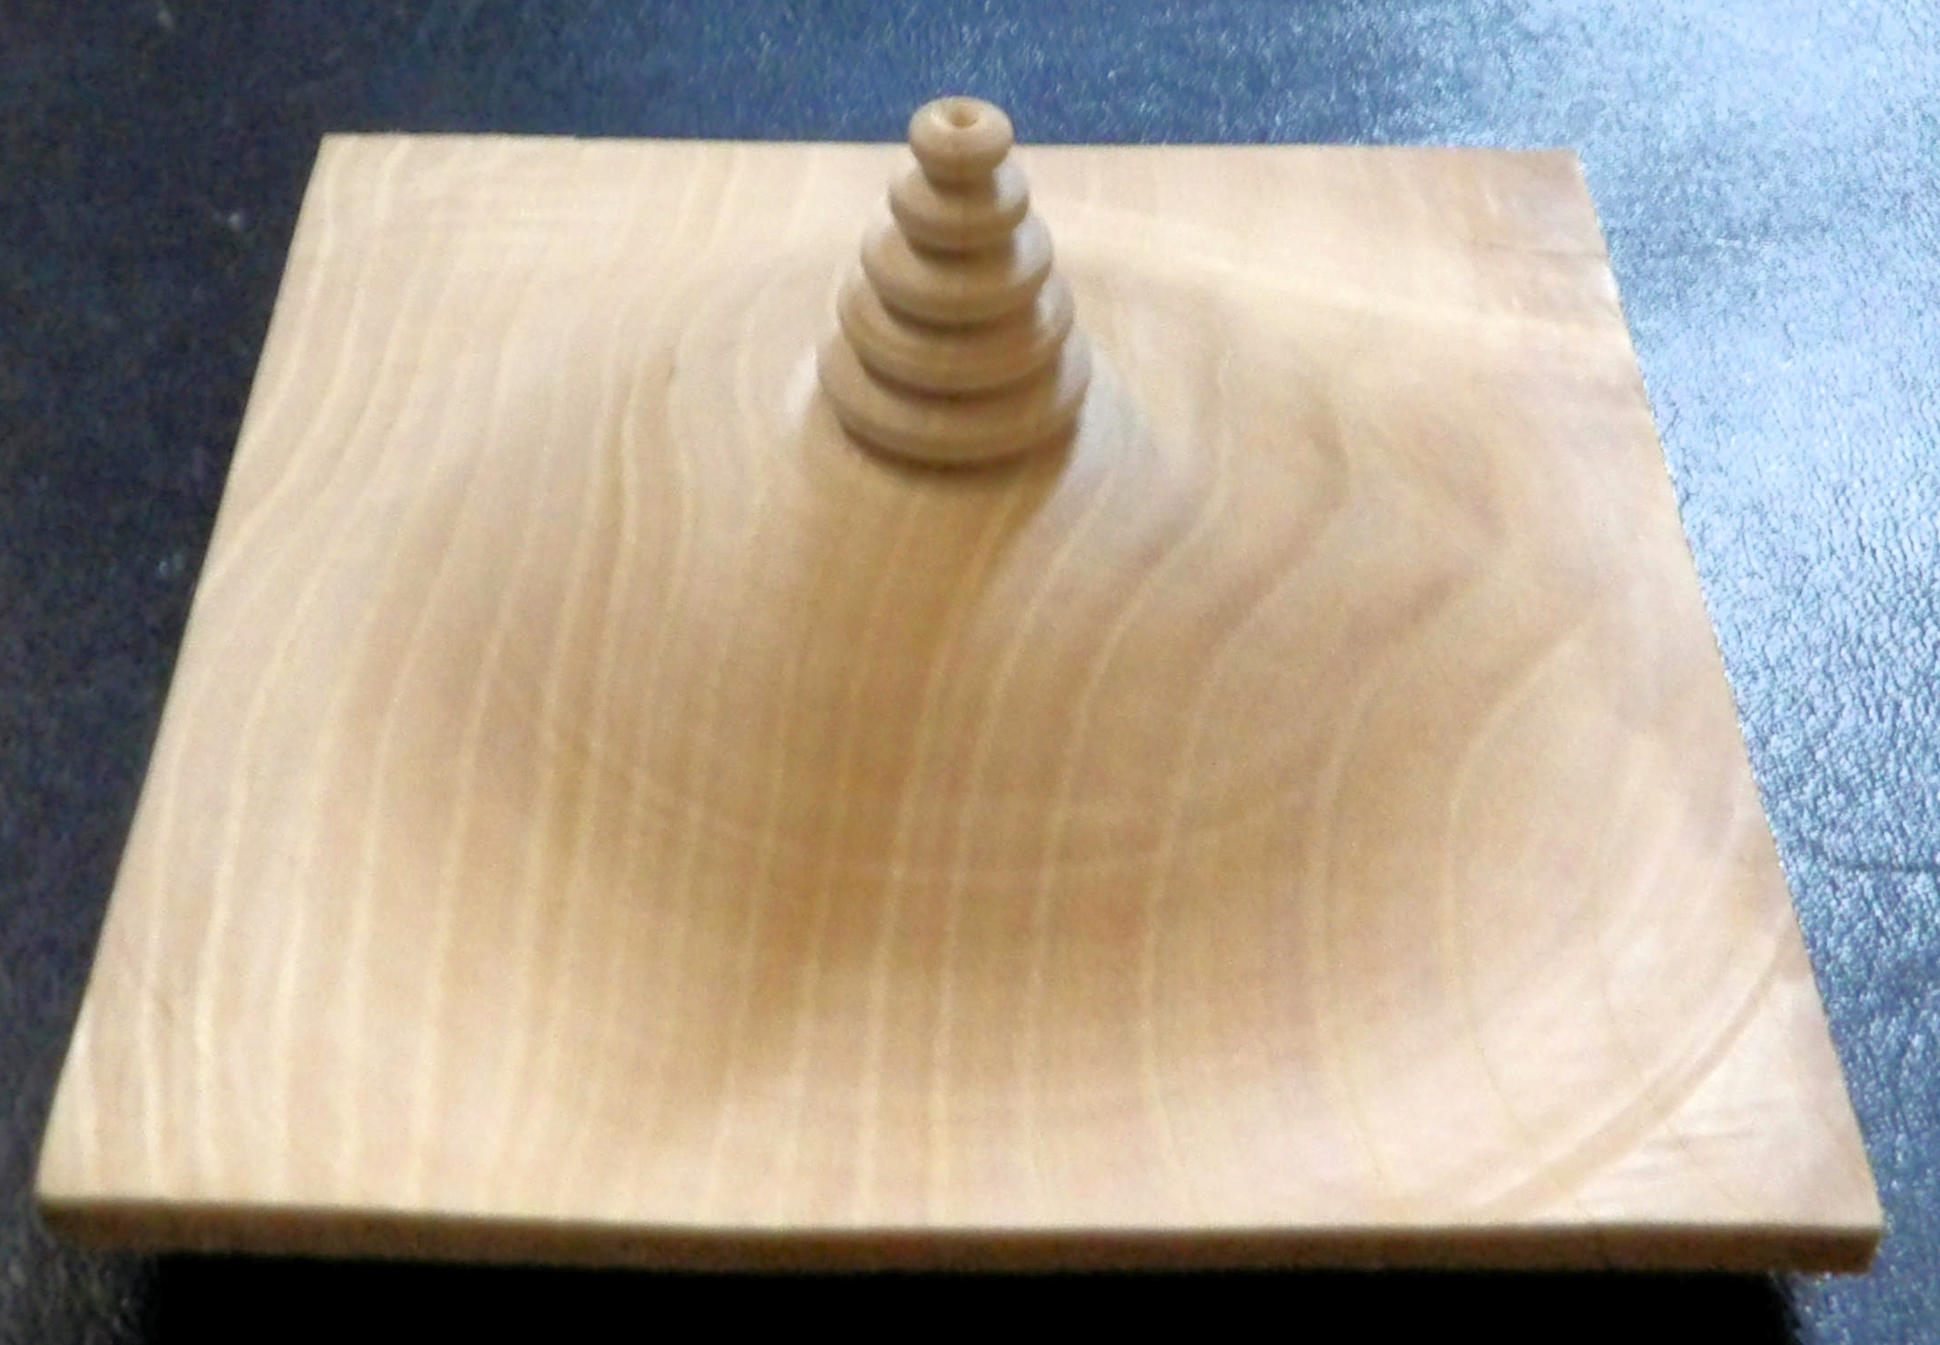
When it came to finishing the foot and the finial, Jason chose a 1/4" bead
forming tool from Ashley
Iles (Crown do similar). These tools are used flute
down. With the handle down and the tool presented at 90° to the spinning timber,
raise the handle and push forward gently to make contact and form the bead. Stop
the cut as soon as the whole arc is in contact with the wood. If you need to
take the bead lower, take a parting tool to scrape away its crest before going
again with the bead former or else the bead is likely to break up.
As the base decoration and particularly the finial are much smaller diameter
than the body of the piece, Jason changed the toolrest to a short one to avoid
having a long reach for the tool. Additionally, the short rest will be
considerably more rigid and stable than trying to cut at the end of a long
flexing rest. Jason doesn't support the end with a tail stock as a 3mm thick
finial will inevitably bounce as it is worked and will cause bruising. However,
judicial use of a finger on the wood adjacent to the tool helped to absorb
vibrations resulting in a cleaner finish.

(click any above for close up view)
(photos by Rick
Patrick & Allan Rae)
<to
Pro Index>
Jason Breach is a Registered Professional Turner (RPT) and Yeoman of the
Turners' Company.
He can be found at
<www.jasonbreach.co.uk>